Monday, 13 December 2010
Baby Panettone
One of the things I love about food blogging is that you actually end up learning a lot about food along the way. I particularly love learning about festive food from around the world, its history, the way foods evolve along with soceity, and so on. Fascinating stuff (well.. for me anyway!). I had one of these warm and fuzzy moments when reading an article about panettone recently. It was so lovely to read about its origins and how significant it is to Italians at this time of year. Food really does bring people together, which I think is one of the nicest things about Christmas. So, even though I am not Italian, I decided I wanted in on this panettone business!
So what is panettone? Panettone is a traditional Italian bread with a domed top enjoyed around Christmas. It is a lovely buttery and lightly sweetened bread dotted with dried fruit such as raisins and candied citron. It is said to have originated in Milan, and is commonly enjoyed warm or lightly toasted along with (and even dunked into) espresso at breakfast.
Although it takes a little time to wait for the dough to rise (I definitely do not recommend attempting to make this on a weekday after work), here is a recipe to make your own baby size panettone. I'm a sucker for anything miniature, aren't you?! To make this recipe, you'll need 8 empty, clean, regular-size cans. I only had 4, so I actually halved the recipe below.
Baby Panettone
Adapted recipe from 200 Christmas Recipes by Hamlyn
2 tsp easy-blend dried yeast
125g caster sugar, plus 1 tsp
175ml hand-hot milk
700g strong bread flour (available in the baking aisle of most supermarkets)
4 large eggs, plus 2 yolks
2 tsp vanilla extract
zest of 2 lemons
175 salted butter, very soft and diced
185g mixed dried fruit
1. Grease 8 x 400ml clean food cans and line with greaseproof paper that extends above the rims. Grease the paper.
2. Stir the yeast and 1 teaspoon sugar into the milk in a large, warm bowl and leave for 10 minutes or until frothy. Stir in 100g of the flour. Cover with clingfilm and leave for 30 minutes.
3. Add the eggs and egg yolks, the remaining flour and the sugar, vanilla, zest and butter. Mix with a round-bladed knife to make a soft dough, adding a little more flour if the dough feels sticky. Turn out onto a lightly floured surface and knead until smooth and elastic. Leave to rise in a lightly greased bowl, covered with clingfilm, for 2-4 hours or until doubled in size.
4. Knock back the dough and lightly knead in the dried fruit. Cut the dough into 8 pieces and drop into the tins. Cover and leave to rise until the dough reaches the can rims.
5. Bake in a preheated oven at 200 degrees celsius (Gas Mark 6) for 20-25 minutes or until risen and golden. Remove from oven and leave in cans for 5 minutes before shaking out the panettone to cool on a wire rack.
Variation
To make a whole panettone instead of 8 baby ones, shape the mixture into 1 large ball. Place in a 15cm round cake tin, greased and lined with a double layer of greased greaseproof paper that extends 10cm above the rim. Cover and leave to rise. Bake for 15 minutes at 200 degrees celcius, then reduce to 180 degrees celcius and bake for 40 minutes until well risen and an inserted skewer comes out clean. Leave in tin for 10 minutes, then cool on a wire rack.
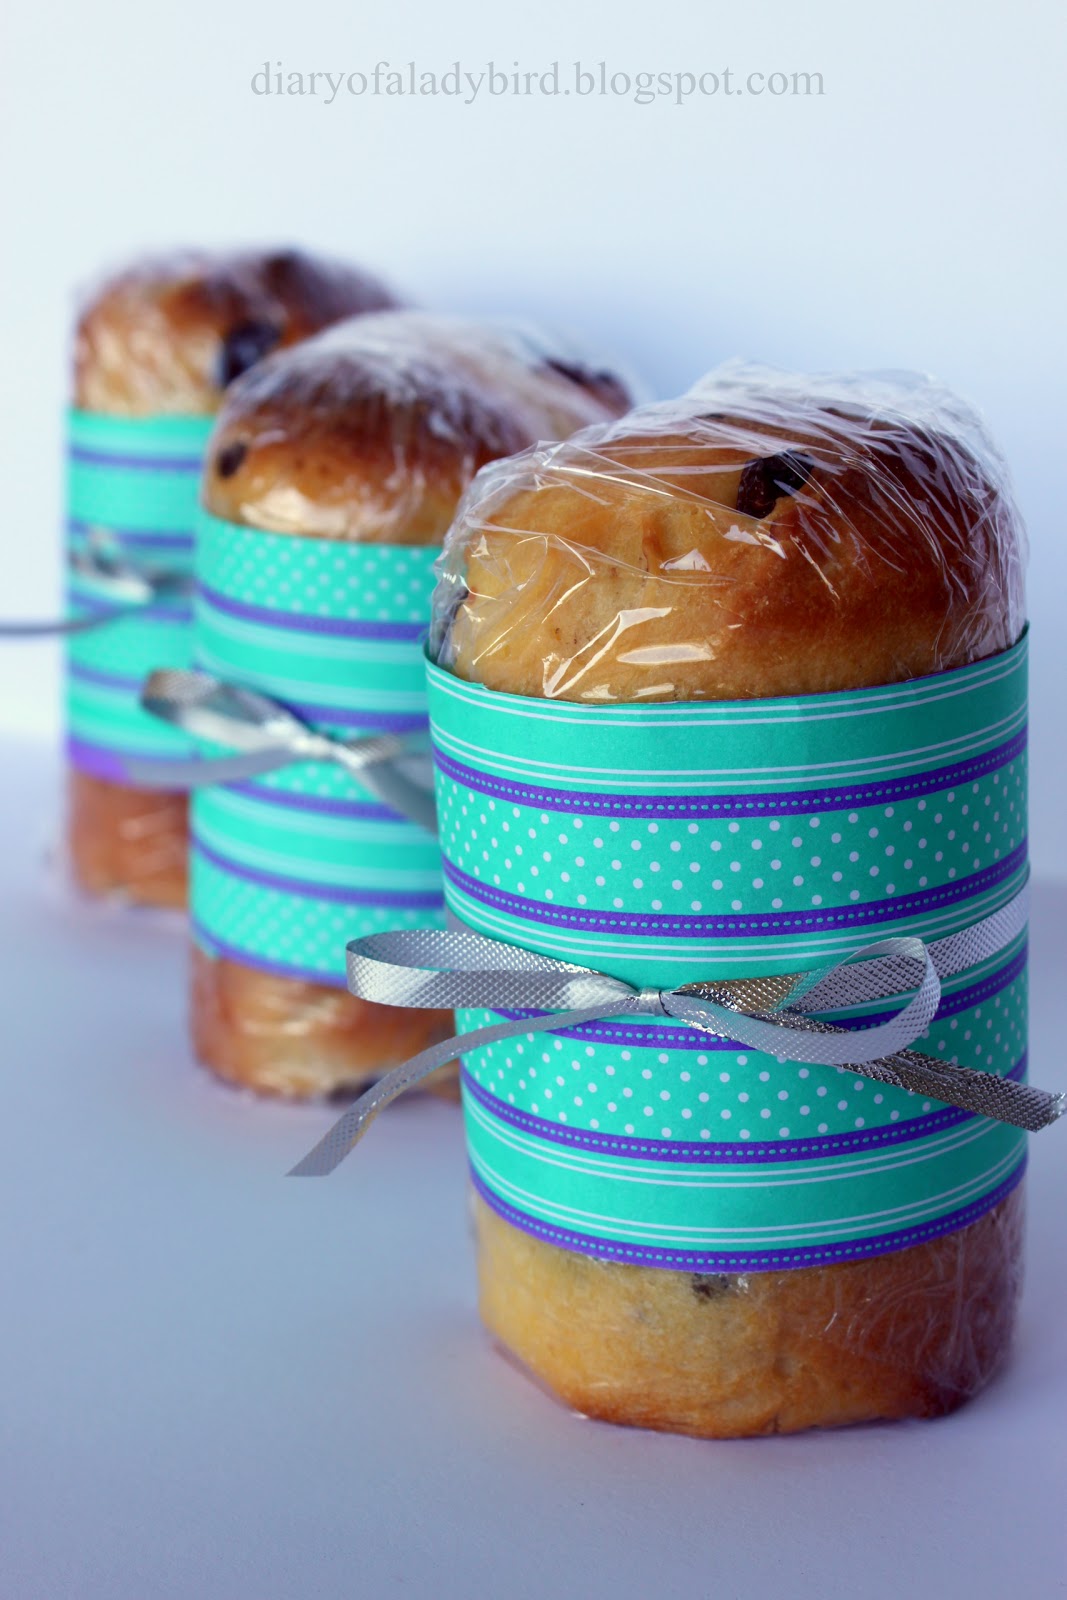
Enjoy at home, or wrap well with clingfilm, add some festive decorations and give away to family/friends!
Ladybird x
Labels:
Bread,
Christmas,
Edible gifts,
Italian Cuisine
Sunday, 12 December 2010
Lime & Passionfruit Curd
If you are not already sold by the title of this post, I must preface this recipe by telling you (rather unashamedly) how absolutely gorgeous it is to eat... The lime and passionfruit make this a wonderfully fresh and flavoursome curd that's like summer on a spoon. It is very easy to make, and would make a wonderful edible gift for a loved one. Stored in a jar with an airtight lid, this curd will keep in the fridge for up to 1 month.
There are many uses for a lovely curd like this... Here are are just a few ideas to get you drooling...
- Served with pancakes
- Injected into vanilla cupcakes with a piping tip
- Paired with whipped cream to sandwich a sponge cake together
- Drizzled over ice cream
- Served with a citrusy cheesecake
But enough with the hyperbole, where's the recipe already?!
Lime & Passionfruit Curd
Adapted recipe from 200 Christmas Recipes by Hamlyn
(makes around 2 1/4 cups quantity)
Ingredients
250g caster sugar
zest and juice of 4 limes, kept aside in separate bowls
125 unsalted butter, cut into pieces
4 eggs, beaten and strained
3 passionfuits
Method
1. Place a heatproof bowl over a saucepan of simmering water, making sure that the bowl is not touching the water. Place the sugar and zest in the bowl and press them against the edge of the bowl with a spoon to release the oils from the zest.
2. Pour the lime juice into the bowl through a sieve and add the butter. Heat, stirring occasionally, until the butter has melted.
3. Whisk the eggs into the mixture and then switch back to the wooden spoon and stir constantly to avoid curdling. Continue stirring over low heat for approximately 20-25 minutes until the curd lightly coats the back of the wooden spoon.
4. Remove the bowl from the heat and cool slightly before stirring through the passionfruit pulp.
5. Transfer to warm, sterilised jars*. Cover each jar with a disc of waxed paper, placed waxed side down. Allow to cool, then close the jars with their lids.
* How to sterilise jars
I have often wondered what this actually entails, but as it turns out, it's relatively simple! To sterilise jars wash them either in the dishwasher or in hot soapy water. Rinse and dry them in the oven on the lowest setting for 15 minutes. Fill the jars while still warm.
Note
The curd will thicken with refrigeration, but if you wish to thin it out again for use simply warm slightly.
Till next time, dear readers!
Ladybird x
Labels:
Christmas,
Edible gifts,
fruit
Saturday, 11 December 2010
Fruit Mince Brownies & the Cookbook of the Month
I was recently over at My Button Cake reading up on (and drooling over) Amber's latest creations when I saw her post on fruit mince brownies made with a recipe from the latest edition of this month's Delicious magazine. Today I was waiting in a supermarket queue when I picked up a copy of the special edition magazine to flip through as I waited. I am usually pretty strong willed against impulse purchases at the checkout, but with page after page of beautiful recipes and photos, I was in love!
And so, rather than having an actual book as Cookbook of the Month for December, I have decided that Delicious magazine should take the place as the featured piece of food literature for the month. My apologies for the delayed announcement - what a bad blogger I've been! I do hope Santa won't strike me off his list! ;)
At any rate, The December/January issue of Delicious It is packed with lots of fantastic Christmas recipes including vegetarian Christmas dishes and amazzzing sweets. There is also a strong focus on the use of seasonal ingredients so that you can use what's available and at its best now rather than trying to emulate European food traditions that aren't really season or climate appropriate for Christmas 'down under'.
Image courtesy of ABC
And so, with thanks to Amber for highlighting why I too needed this magazine, I bring you the Fruit Mince Brownies recipe from Delicious. Oh yes, delicious indeed, incredibly moist, and wickedly easy...
Ingredients
200g chocolate (70% cocoa solids), chopped300g brown sugar
250g unsalted butter, chopped
4 eggs, lightly beaten
1 1/3c (200g) plain flour
1/4 tsp baking powder
1/3 c (35g) cocoa, plus extra to dust
1/3 c (85g) fruit mince
1 tsp mixed spice
1 c (100g) toasted walnuts, chopped
Method
1. Preheat the oven to 180 degrees Celsius. Grease a 22cm square cake or brownie pan and line the base with baking paper.
2. Place chocolate, sugar and butter in a saucepan over low heat, stirring until melted and well combined.
3.Remove from heat, cool slightly, then stir in eggs until well combined. Add flour, baking powder, cocoa, fruit mince, mixed spice and nuts, stirring to combine.
4. Spread into the pan and bake for 25 mins or until just set.
5. Cool in pan, then dust with cocoa. Cut into 12 squares and serve.
Brownies will keep in an airtight container for 2-3 days.
Subscribe to:
Posts (Atom)


