Thursday 28 July 2011

Sticky date pudding with butterscotch sauce and almond praline


How are we all going with Masterchef this season? Or do you watch it at all...? I guess I can only speak for myself and what I've heard from my family and friends... It is great to have Masterchef back on again (and I never quite got into the whole celebrity/children's versions). However, I must say, I'm not enjoying it as much as I did the first season, even the second season.. I am no longer a 'religious' viewer, and nor do my family and friends follow it with the same fervour as they once did. I'm not quite sure what it is, but it seems to me that Masterchef has become a little larger than life, a little over-dramatic perhaps... At any rate, may the best cook win!

Regardless of your sentiments on the show, please allow me to take all you Masterchef fans on a nostalgic journey back to Season 1 in 2009. Do you remember the Sticky date pudding challenge?! How many of you bookmarked the recipe on the website and never got around to making it..? Anyone? Well, I know I did.. cleaning up my bookmarks recently I decided it was high time I got around to it making it!

This is a winter classic -absolutely wonderful :)

Sticky date pudding with butterscotch sauce and almond praline
Recipe from Masterchef Australia (Season 1)

Ingredients

180g dates, pitted and roughly chopped
1¼ cups (310ml) water
½ tsp bicarbonate of soda
¾ cup (165g) firmly packed brown sugar
60g butter, softened and chopped
2 eggs
1 cup (150g) self-raising flour

Almond praline
½ cup (110g) caster sugar
¼ cup (35g) slivered almonds

Butterscotch sauce
50g butter
1 cup (220g) brown sugar
1 cup (250ml) cream
1 tsp vanilla extract

Method
 1. Preheat oven to 180˚C (160˚C fan-forced). Lightly grease eight (½ cup capacity) metal dariole moulds.

2. Place dates and water in a saucepan and bring to the boil over a high heat. Remove from the heat. Add bicarbonate of soda, stir until dates start to break down, set aside to cool, stirring occasionally.


3. Beat butter and sugar in a bowl using a hand beater, gradually add eggs one at a time, beat until light and fluffy.


4. Add date mixture, stir to combine. Carefully fold through sifted flour, divide mixture evenly between the eight moulds, until 2/3 full.

5. Place moulds in a baking tray, carefully pour water in tray until it comes up 1/3 of the side of the moulds. Bake in oven for 40 minutes or until golden and skewer comes out clean.

6. Meanwhile, for the almond praline, combine sugar and 2 tablespoons water in a saucepan over medium heat and cook caramel without stirring, swirling pan, until deep golden. Scatter almonds onto a baking paper-lined oven tray, pour over caramel and cool until set. Break praline into pieces.


7. For the butterscotch sauce, combine butter, sugar, cream and vanilla in small saucepan over low heat until butter melts and sugar dissolves. Bring sauce to the boil, reduce heat and cook for 5-6 minutes or until sauce thickens slightly.

8. To serve, invert the hot pudding onto a serving plate, top with butterscotch sauce and shards of praline.


CUPCAKE variation
As I only have 4 dariole moulds, I used the leftover pudding batter to make some delicious cupcakes!


Here's how...

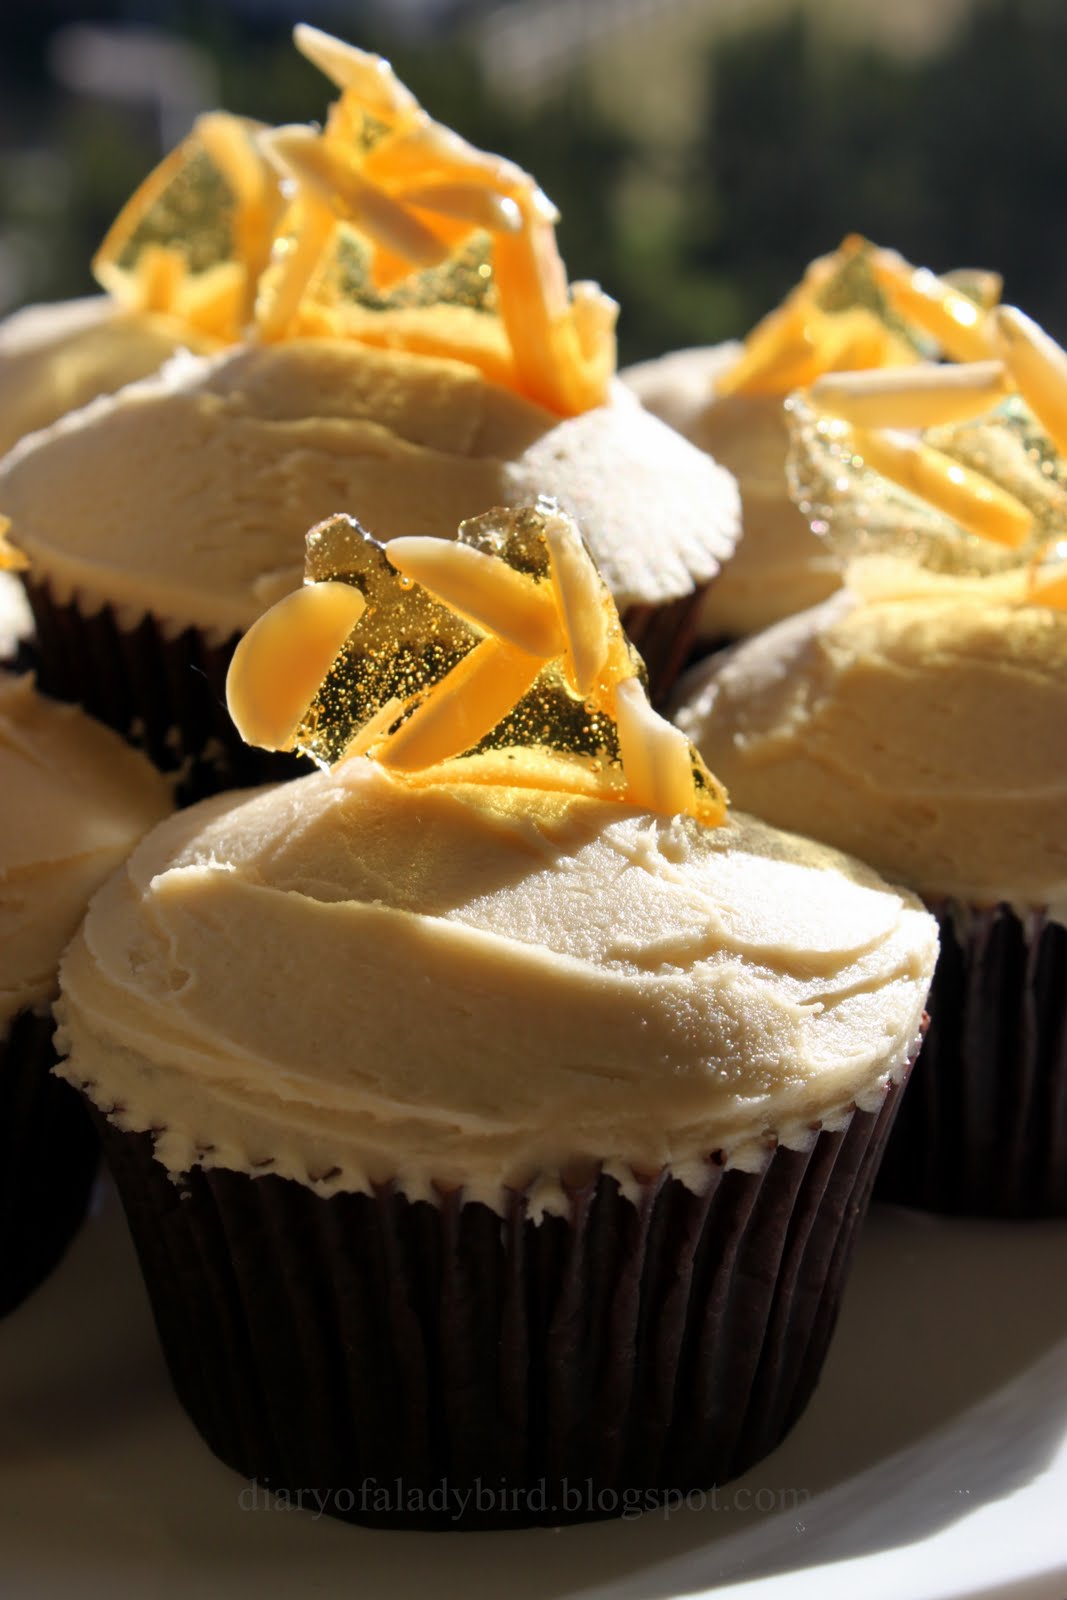
Sticky date cupcakes with butterscotch buttercream and almond praline
makes 10-12 cupcakes

Cupcakes
For the cupcakes, follow the above pudding recipe and divide among a cupcake paper lined muffin tin, filling each three-quarters. Bake at 180 degrees celsius on an upper shelf for 30 minutes, or until an inserted skewer comes out clean. Sit in tin for a few minutes then transfer to a wire rack to cool.


Butterscotch buttercream
Cream 125g softened unsalted butter, 1½ cups sifted icing sugar and 1 teaspoon vanilla extract until light and fluffy. Add 4-5 tablespoons cooled butterscotch sauce (recipe provided above) in an electric mixer until the desired consistency is achieved. Pipe or spread over the cooled cupcakes, and finish with a shard of the almond praline (recipe provided above).


So tell me, if you are a viewer, what are your thoughts on the current season of Masterchef Australia?

Ladybird x

Tuesday 26 July 2011

The WWE Wrestling Cake


A quick show-and-tell post from me today - life has got in the way of blogging of late, but I am so happy that July has turned out to be such a great month for cake decorating!

This World Wrestling Entertainment (WWE) cake was for young James who turned 8 last week - he is a BIG wrestling fan, so a wrestling cake was an obvious choice for the occasion.


It was a lot of fun resarching and making this cake - never have I paid so much attention to wrestlers' oompa loompa like skintone, oh-so-stylish mullets, and their equally dapper costumes!

This was my first time at creating figurines for a cake.. a little daunting, but I was happy with the result for a first attempt, especially with the little details such as their six-packs and burly muscles.

But the best part of all...? James's reaction to his cake as captured by his mum on camera and shared with me the next day - now there's a little grin that made it all the more worthwhile :)


Till next time,

Ladybird x

PS - I've had a couple of enquiries about cake orders this month so I thought I'd just make a general announcement regarding this through my blog... Yes, I am definitely open to doing cake/cupcake orders in the Sydney area :) If you are interested and would like to get in touch with me, please email me at diaryofaladybird[at]gmail[dot]com.

Thursday 14 July 2011

The joy of creating birthday cakes


It is always an honour to be asked to make a cake for someone for a special occasion, but to be asked to create a cake celebrating someone's birthday is truly special... A birthday marks the day you made your debut to the world - and there is only one of you in the whole world, so what a special debut it is! It is for this reason that I genuinely love creating birthday cakes and cupcakes for others, regardless of whether I know the birthday girl/boy personally or not. I do love the feel good vibe of being involved in a happy occasion, even if it is in a very small way by making a cake...


I recently had the pleasure of making this birthday cake for a relative celebrating her 20th birthday. The brief was simple and to the point. Flavour? chocolate. Colour? red. Simple briefs like that are some of my favourite because they just beg for a little creative thinking. In this case, I created a 7 inch eggless chocolate cake layered with a lovely milk/dark chocolate ganache. I then decorated it with RTR fondant in a 50s inspired polka dot and bow theme for a girl who loves the colour red... Her smile upon seeing it was well worth the effort :)


Here is my 'go to' recipe for a lovely eggless chocolate cake - a must in a baker's repertoire in case of allergies or eggless preference orders!

Eggless Chocolate Cake
An adpated recipe from Divine Taste

Ingredients

200 gm (1 1/2 cups) plain flour
50 gm (1/4 cup) cocoa powder*
2 tsp baking powder
1 tsp baking soda/ sodium bicarbonate
4 teaspoons caster sugar
1 tin/400gm sweetened condensed milk
150g unsalted butter, melted
2 tsp good quality vanilla essence
150 ml water

* I have had most success with 'Cadbury's Bournville Cocoa' from the supermarket. My trials with richer cocoa powders such a dutch cocoa powder have been unsuccessful.

Method
1. Preheat the oven to 100 - 120 degrees celcuis. Grease and line the bottom of a round cake tin with greaseproof paper/baking parchment/butter paper. I used a 7 inch cake tin, but an 8 or 9 inch would work equally well.

2. Into a mixing bowl, sift the flour, cocoa powder, baking powder, baking soda and sugar. Whisk together briefly to ensure a uniform mixture.

3. Add in the condensed milk, melted butter, vanilla essence and water. Beat with an electric hand mixer, whisk or spoon just until the mixture is uniform and smooth and there are no lumps. This shouldn’t take more than a minute with an electric hand mixer/beater. Be careful not to over beat as this tends to stiffen the batter which might result into a harder textured cake.


4. Pour the batter into the cake tin and bake for an hour at 150 degree celcius.


5. Turn out onto a wire rack to cool completely, then ice/decorate as desired.

Tip: When baking cakes without eggs, it is essential to ensure you cake is cooked all the way through before removing it from the oven. Failure to do so will sadly result in a sunken cake... To avoid this, do a cake skewer test in the centre of the cake, even if you're confident it's cooked properly.

And voila, a beautiful chocolate cake - here is an innards shot!


Of course, the overall result with the flavour was enhanced by both the sugar syrup and chocolate ganache I used in assembling the cake before covering it with fondant. For your reference, here are the recipes to each of these.

Sugar Syrup
Recipe from the Planet Cake book by Paris Cutler

100g apricot jam
100ml boiling water
2 teaspoons Cointreau (optional)

- Whisk together the jam and hot water in a small bowl, then pass through a sieve to remove any lumps. Once cool, stir in the liqueur and use as required.
- Some people like to brush layers of cake with a pastry brush, however, I often prefer a small (and of course, clean) spray bottle -  it's quick, easy, and no risk of brush fibres being left behind in the cake!


Milk/dark chocolate ganache
This is an original Diary of a Ladybird recipe which I believe is ideal for cakes/cupcakes for children or those who don't like dark chocolate very much)

400g dark chocolate, finely chopped
400g milk chocolate, finely chopped
2 cups pure cream

1. Place the chocolate in a heatproof bowl.
2. Heat the cream to boiling point then remove from heat.
3. Pour the cream over the chocolate and stir until combined.
4. Allow to cool and set (ideally) overnight.

Tips

- You can store extra ganache in the fridge for up to a week, but ensure your cream has at least a week's shelf life from the date you use it. Then when you need to use it, remove it from the fridge and soften it by warming it up in short bursts (10 - 15 seconds) in the microwave.

- If you are make a larger amount of ganache, you can store it in the freezer in smaller containers. Then just take it out and let it come up to room temperature before you need to use it. You can then soften it in the same way you would if it were straight out of the fridge.


Until next time, dear readers...
Ladybird xxx

Thursday 7 July 2011

Ladybird Cupcakes


I can't believe I've been blogging for almost 2 years now and have never made Ladybird Cupcakes before now! Well today's post addresses this most despicable oversight in Diary of a Ladybird's archives, and hopefully this mini-tutorial will guide you through how you can make them too.

The inspiration for these comes from the Planet Cake decorating book by Paris Cutler.


Bake your cupcakes
Bake your cupcake of choice. I chose my favourite chocolate cupcake/cake recipe, but you could also go for a classic vanilla cupcake.

Ganache the cupcakes
Using your ganache of choice, roughly ganache the tops of the cooled cupcakes. Allow to set for at least half an hour, then smooth over with a palette knife dipped in hot water to create a perfectly smooth and even cupcake surface. Allow to set for at least an hour, and once dry to touch they are ready for decorating.


Cover with black fondant
To cover and decorate the fondant you will need black and red fondant, as well as a very small amount of white fondant. Roll out your black fondant to a 3mm thickness, and cut out circles with a circle cutter to fit the top of your cupcakes. Lay and smooth the fondant on top of the cupcake.


Decorate with fondant
Now the fun part of decorating begins! Thinly roll out your red fondant and using the same circle cutter you used for the black fondant, cut out the same number of red circles. Then using the cutter, cut a small piece out of the circle, then split the larger portion in half with a sharp knife. The picture below should hopefully explain what I mean here...


Using the two larger pieces, dab/brush a small amount of water on the reverse of each and lay them on top of the cupcakes with the red pieces (wings) splayed apart slightly. Discard the remaining piece of red fondant.


Using a small circle cutter, cut out the ladybird spots from some rolled black fondant and attach them to the wings with a tiny amount of water dabbed beneath each spot.


Make the final touches
To make the ladybirds' eyes, roll tiny balls of white fondant and attach them to the cupcake (with a tiny touch of water if necessary). For the pupil in each, use a very fine paintbrush and a little black food dye.

Finally, press part of the end of a plastic straw (or a clean plastic pen cap) to create the smile indent in each ladybird's face.


So there you have it - simple and beautiful ladybird cupcakes. I don't know about you, but I find their little faces so cute that I can't help but smile back at them! :)


Till next time, dear readers...
 
Ladybird x

PS- Remember my salted caramel, peanut and chocolate tarts? I've entered my recipe into the Lurpak Callenge and I'd really appreciate your support in the final days of voting.  To vote for my original recipe, please click here!

Tuesday 5 July 2011

Win a $50 Byron Bay Cookie Company hamper!

While in Byron Bay recently, I had the pleasure of visiting the Byron Bay Cookie Company's headquarters and retail outlet to learn more about their range of products. I also had the pleasure of sampling some of their delicious baked goods - lucky me! :)


Many of you reading this post will already know about Byron Bay Cookie Company's cookies - they are avaialble in a vast range of flavours and there are plenty of gluten-free options. They can be seen in cafes and coffee carts around Australia, as well as on airlines and in selected department stores both in Australia and the UK. Their products are now also available for purchase through http://www.cookie.com.au/ and http://www.amazon.com/.


The Byron Bay Cookie Company has been around since 1990 and is probably best known for its large, iconic cookies. Nowadays though, there are also the smaller, delicious biscuits from Luken & May, and crispbreads from Byron Bay Gourmet Foods.


My personal favourites are the white choc chunk & macadamia nut cookie, the brand new muesli cookie, as well as the Byron Bay Gourmet Food's wonderful (and Sydney Royal Show gold medal winning) rosemary & sea salt crispbread - great served on a cheese platter. I'm also a big fan of the Luken & May range - great for sharing at home, or a lovely gift when visiting family/friends.


*** GIVEAWAY ***
Thanks to the good people at the Byron Bay Cookie Company, one lucky Diary of a Ladybird reader has the chance to win this wonderful hamper of delicious Byron Bay Cookie Company products, worth $50!


To enter:
  1. Simply tell me what your favourite Byron Bay Cookie Company product is by commenting on this post.
  2. Then, email me a copy of your comment along with your full name and delivery address to diaryofaladybird[at]gmail[dot]com.
Entries close at midnight AEST July 26 and the giveaway is restricted to Australian residents only (sorry!). The winning entry will be selected by random.


Good luck!

Ladybird x

*** This giveaway has now closed ***
Congratulations to Erin of Gravelly Beach in Tasmania!

Sunday 3 July 2011

New York Cheesecake


Happy 4th of July! Oh, how I had grand plans of creating something lovely especially for all my loyal readers in the US and those celebrating the 4th of July around the world, something as I had done last year with my Independence Day Cupcakes... alas, it has been a most busy weekend!

Nonetheless, I simply had to make something to mark Independence Day - so what better than a pure, unadulterated classic like a New York Cheesecake? Since making this cake, I've been wondering about the history of this iconic cake but my online searches have largely been unfruitful .. From a couple of sources I have read that this simple style of cheesecake was very popular in New York in the early 1900s. I'm not sure if this is true though, so if any of you readers know, please share! I do love a good morsel of culinary history ;)


New York Cheesecake
Adapted recipe from Good Taste magazine (May 2008)

Ingredients

1 x 250g pkt plain sweet biscuits (I used a combination of 'Digestive' & Arnott's 'Nice' biscuits)
125g unsalted butter, melted
750g cream cheese, at room temperature
215g (1 cup) caster sugar
1/2 tsp vanilla extract
2 tsp finely grated lemon rind
2 tbs plain flour
4 eggs
1 x 300ml ctn sour cream
raspberries to serve (optional)

Method

1. Preheat oven to 160°C. Lightly grease, and line the base of a 23cm (base measurement) springform pan with non-stick baking paper.

2. Place the biscuits in the bowl of a food processor and process until finely crushed. Add the butter and process until well combined. Transfer to the lined pan. Use a straight-sided glass to spread and press the biscuit mixture firmly over the base and side of pan, leaving 1cm at the top of the pan. Cover with plastic wrap and place in the fridge for 30 minutes to chill.


3. Meanwhile, use an electric beater to beat the cream cheese, sugar, vanilla and lemon rind in a large bowl until just combined. Beat in the flour. Add the eggs, 1 at a time, beating well after each addition until combined. Stir in the sour cream until just combined.


4. Pour the cream cheese mixture into the base.


Place the pan on a baking tray and bake for 1 1/4-1 1/2 hours or until just set in the centre. Turn oven off. Leave the cheesecake in oven, with the door ajar, for 2 hours or until cooled completely (this will prevent cheesecake from cracking). Place in the fridge for 4 hours to chill.

5. Cut into wedges, and serve with a few raspberries.


This recipe produces a delicious result! Wishing you all a very happy 4th of July, whatever may be on your menu tomorrow :)


Ladybird x

Friday 1 July 2011

The Cardamom Pod, Byron Bay


The one thing I have always loved about Byron Bay is that there are ample and delicious food options for vegetarians such as myself. For diners like me, it is not always easy to find satisfying vegetarian options when travelling, so when visiting Byron Bay I take great comfort in knowing that in just about every cafe and restaurant, there will be at least one item on the menu for me to enjoy. But a real highlight for me when visiting Byron is dining at The Cardamom Pod - a fantastic little vegetarian cafe tucked away in an arcade in the town centre.

The Cardamom Pod has played host to many happy diners (both vegetarian and non-vegetarian alike) for many years now, and is popular with visitors and locals. Their offering of traditional Indian dishes as well as modern fusion cuisine means that there is something for everyone here, so it's no surprise that this place remains so popular. Run by Hare Krishna devotees, the food at The Cardamom Pod is egg-free, as well as the vast majority of dishes also being onion and garlic free. The food on offer here (like at Govinda restaurants around the world) is 'sattvic'. In Ayurveda, a sattvic or yogic diet is one that is clean, pure and wholesome. The food is never too salty nor sweet, and it satisfies the body and soul.


Hot, comforting food is available, including an array of traditional Indian dishes such as dals, paneer dishes, kofta balls in gravy, and vegetable preparations to be enjoyed alongside rice, papadums and samosas. There are also more western dishes available such as vegetarian lasagne. Vibrant and freshly prepared salads and tempting desserts entice us from the chilled display upon our arrival, and I just know it's going to be hard deciding on what to order!


We are greeted and served by the lovely Drew, who guides us through the hot food and salads available for the day. He also tells us a bit about where the cafe sources their ingredients, much of which is locally grown and organic. I also learn that a local dairy supplies them with fresh milk from which they make their own paneer - a firm cottage cheese often used in Indian cuisine. Nothing beats freshly made paneer - it's delicious!


The great thing about dining with a group of family/friends is that you can sample a wide range of dishes, and there are no hard feelings about the occasional stolen taste test from your fellow diners' plates! For your viewing pleasure, here are some pictures of our sumptuous vegetarian feast...


I thoroughly enjoy my vegetarian lasagne served with side salad. The Moroccan inspired baby spinach, chickpea and tomato salad with tangy yoghurt dressing is really good...


To finish, we share a slice of lemon and vanilla bean baked cheesecake with poached pear and syrup - simply divine!


Ladybird and family dined as guests of The Cardamom Pod.

The Cardamom Pod
Shop 8, The Pier Arcade
7 Lawson St
Byron Bay, NSW
Related Posts with Thumbnails