Tuesday 29 June 2010

A History of Meals, Adelaide

On Sunday I visited the Unley Museum to check out the Dig In, Don't Wait and Just My Cup of Tea exhibitions. These exhibitions were about the history of Australian meals, as well as what comes in between. The plaque on the entrance of the exhibition aptly explained the premise of the exhibitions to be viewed by visitors:

What, when and how we eat all reflect our cultural and family traditions as well as our personal taste. They are also influenced by changes in the food industry, new attitudes to health and cultural changes in our society. This exhibition is a look at the history of meals, at what's changed, and what's stayed the same.

The exhibitions offered lots of opportunities for community participation - flaps to be opened, puzzles, blackboards and play dough - lots of things for curious and South Australian foodies, young and old. There were old cookbooks, serving ware and stories from South Australian residents. So here are some highlights from my visit to the Unley Museum, as well as some of the interesting facts I learnt about Australian meals over the last 150 years and the foods' origins.

A table manners themed snakes and ladders board


From reading about our culinary past, the British influence was evident. However, there was also stories about native Australian cuisine.

The humble sandwich - named after the Earl of Sandwich in the mid 1700s

Old cookbooks, magazine articles and print advertisements...
I love this old Kellogg's ad :)
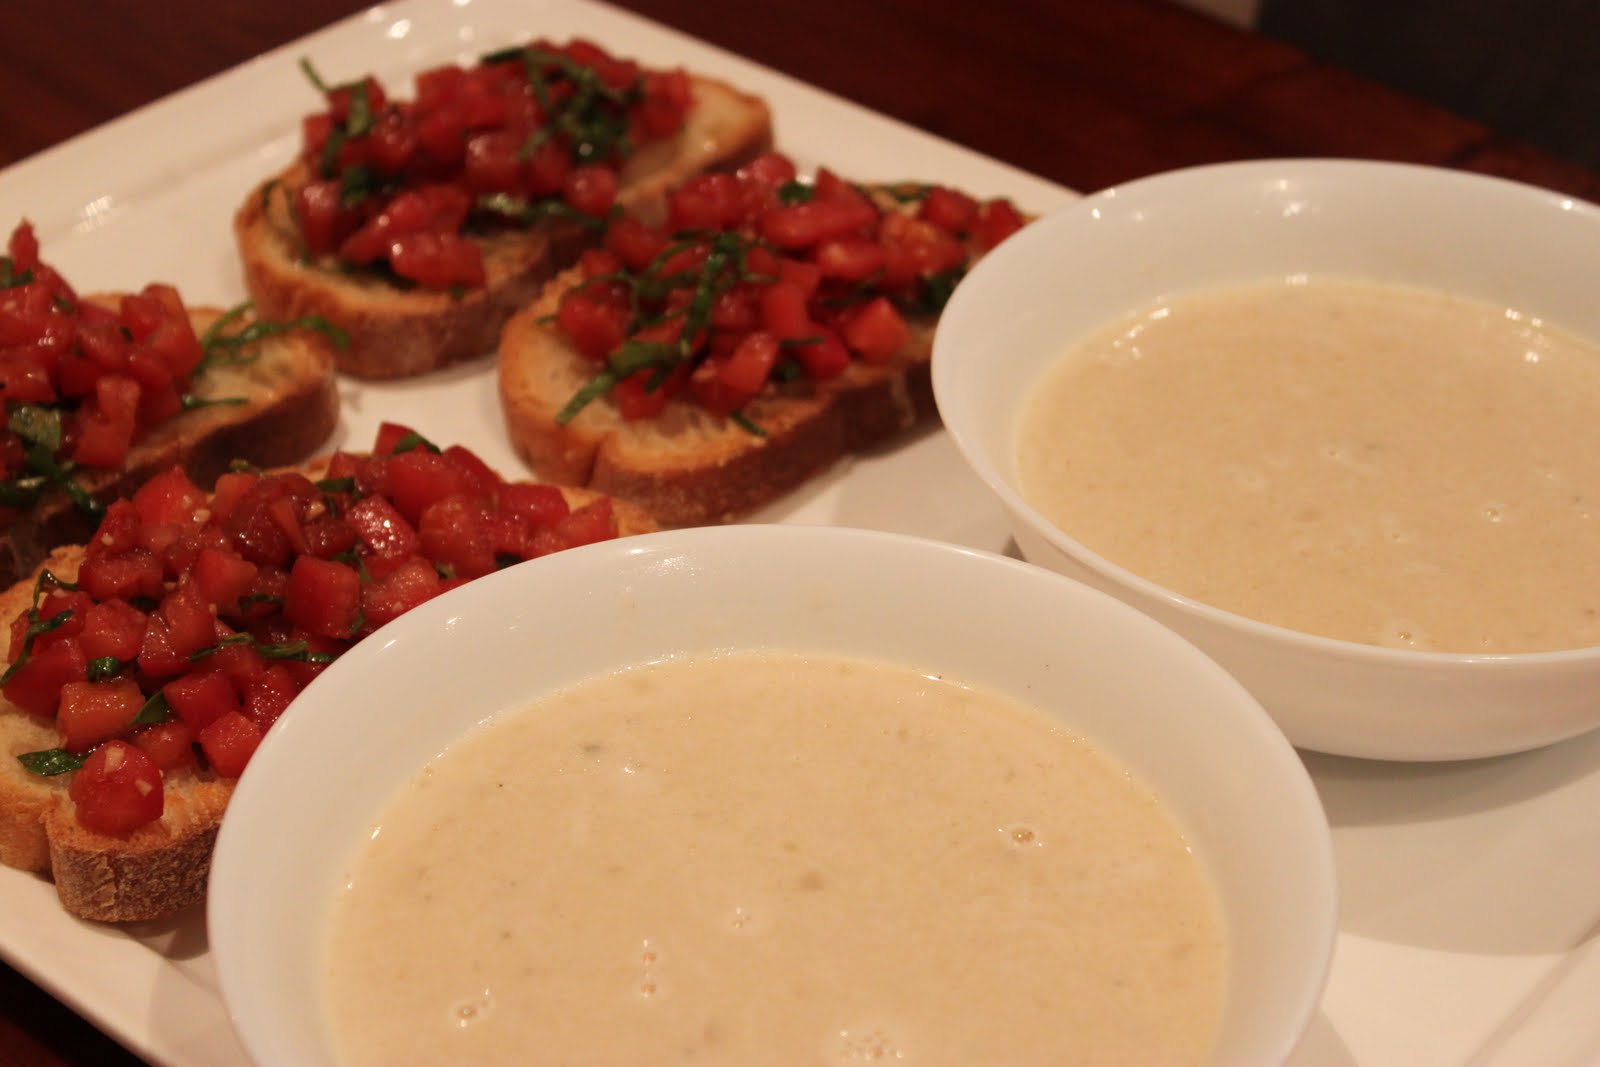
Mmm.. yes please!

And nowadays rice is such an important staple in the Australian pantry

Some old work from Women's Weekly

Hrmmm, I'll pass... but recipes like this were common during the Great Depression when everyday Australians simply had to make do and make a meal out of next to nothing. Forget the array of fruit and vegetables we have today! Can you imagine life without peaches? without capsicum? without zucchini?!

Excerpts from the wall of manners with visitors' reflections about table manners written on doilies...
I agree!

Old tea pots and tea caddies. Interestingly, the size of teapots became larger as tea became cheaper. Buying a teapot was a difficult decision for families - it was an important household item and it had to last.


Beautiful antique crockery. It was uncommon to own a complete matching set of fine teacups and saucers - the cost was simply too great. An eclectic mix of cups and saucers was far more common and, interestingly, this is very much in fashion today.


Antique hand-embroidered napery and fine serving ware


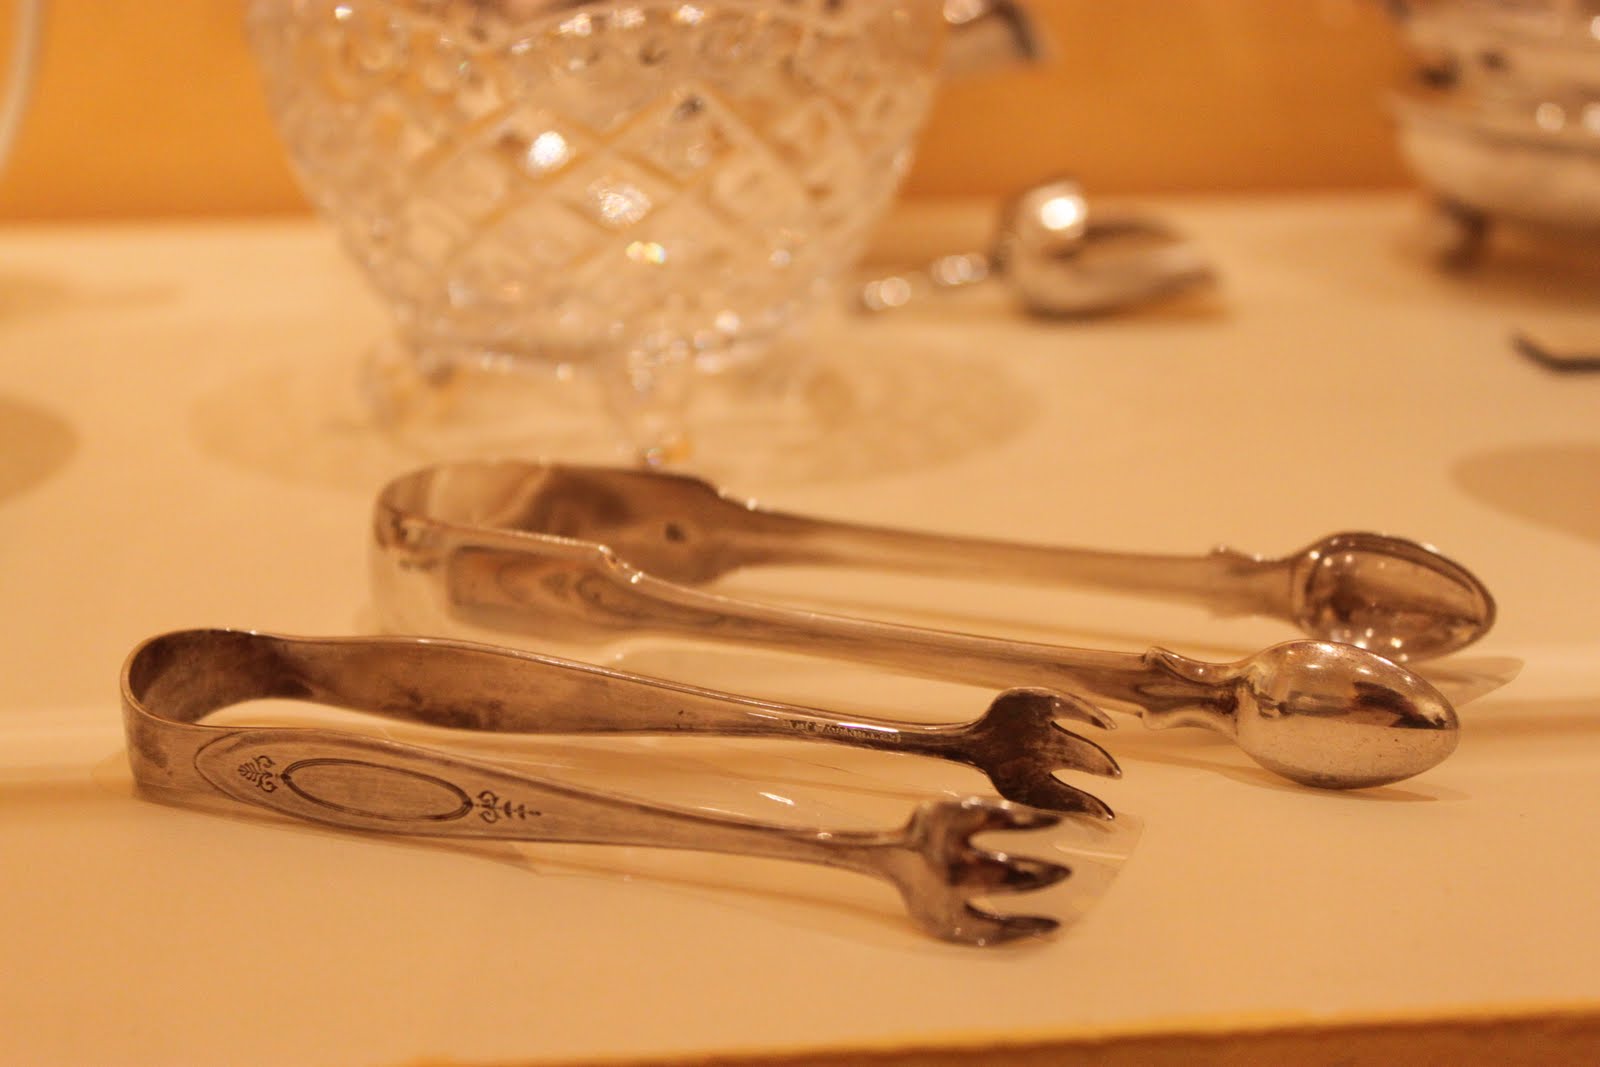
Antique silver sugarcube tongs. White sugar cubes were for the elite whereas raw sugar was considered the sweetener for the working class.

 
The Dig In, Don't Wait and Just My Cup of Tea exhibitions offered such an interesting insight into what Australians have been eating over the past 150 years. It was an eye-opening experience, and I couldn't help but walk away feeling very grateful for modern-day Australian cuisine. We are truly blessed with a tremendous variety of quality, readily-available ingredients. And with that, I sat down to a simple cup of tea upon return to my hotel room... and I savoured every drop.
If you have the chance, check out the Unley Museum in Adelaide, South Australia. It's worth a visit!

Unley Museum
80 Edmund Ave, Unley
Mon to Wed, 10am - 4pm
Sun 1:30pm - 4:30pm


Ladybird x

Saturday 26 June 2010

Little Macs (Cheeseburger Macarons)


My pursuit and growing obsession over macarons continues, and this was my third attempt to try and perfect this little french sweet. Upon the advice of my fellow blogger and friend from My Button Cake, I tried the Gourmet Traveller macaron recipe. Seeing as though there are so many macaron recipes, tips and tricks out there, I felt it would be wise to take advice from Amber as she is such a deft hand at macarons.


However, I didn't want to make plain macarons.. I wanted to do something a bit more creative. Watching Masterchef contestants try and recreate Heston Bluemnthal's amazing dishes, I was inspired to create something sweet that looked like a savoury item. I thought a fast food item would be fun to do, so here is a sweet (and very small) take on the Big Mac.

Introducing The Little Mac... (as in 'macaron'!)

The bun
To start making these little macs I made the macarons. I coloured the batter with a little bown and yellow food colour to achieve the bun tone, and then I topped some of them with a sprinkle of sesame seeds before baking. I was reasonably happy with the macarons after baking .. The feet were not quite as high as they could be, so I may have overmixed a little. However, the shell was nice and delicate, and the inside was lovely and squidgy :) Voila - a toasted sesame seed bun!

Burger filling
The patties were made by cutting out circles from readymade chocolate biscuits. For the lettuce and cheese slices, I coloured white fondant with green and yellow food colouring and rolled it out thinly. For the cheese I cut out a neat square, and for the lettuce I cut up a rough circle and frilled the edges roughly with my fingertips for a realistic effect.


The secret sauce
Well, it's not secret anymore ;) I used a white chocolate ganache made by using 1/4 cup pure cream and 150g white chocolate combined in a bowl over a pot of simmering water.


To put the Little Mac together I layered the lettuce, cheese, patty and macaroon shells with a little ganache in between.


These macarons were so much fun to make, and I must say, the likeness to the real thing is humorous :D And if you're more of a cheeseburger than a Big Mac fan.. you could skip the extra layer :)


Have a great weekend, readers!


Ladybird x

A Tuscan Supper


On a cold weeknight, a lovely soup and crunchy bread is so comforting. This easy and delicious combination is my new favourite...

Tuscan white bean and garlic soup with a side of bruschetta

This soup is a delicate and subtly flavoured one, so the punchy bruschetta is a great pairing. Strictly speaking, using tomatoes and basil as part of a cosy winter meal is not very seasonal (quite the faux pas actually), however my fruit and veg shop still has the most amazing tomatoes and basil in stock. How can I resist?!

Tuscan White Bean and Garlic Soup
(a Giada De Laurentis recipe)
2 tsbp unsalted butter
1 tbsp olive oil
2 large shallots, chopped
2 cans cannellini beans, drained and rinsed
1 sage leaf
4 cups vegetable stock (or chicken if you'd prefer)
4 cloves garlic, halved
1/2 c single/pouring cream
salt and freshly ground pepper

1. Place a medium, heavy based pot on medium heat and add the butter, olive oil and shallot. Add a pinch of salt and cook for about 5 minutes until softened.
2. Add the sage leaf and beans, and stir to combine.
3. Add the stock and bring to a simmer.
4. Add the garlic and simmer until the garlic is softened, about 10 minutes.
5. Remove from heat and fish out the garlic skins and discard. Then puree the soup with a hand-held blender. Be careful not to burn yourself! Transfer to a bowl for this step if you need to.
6. Return to the heat to add the cream and seasoning, then remove from heat and cover to keep warm.


This is how I make my bruschetta. I think there are as many variations as there are cooks! This recipe doesn't include red onion - I am not a big fan of it in bruschetta, but you could always add some if desired :)

Bruschetta
6 ripe roma tomatoes
1/2 c basil, shredded
1 garlic glove, finely chopped
2 tbsp extra virgin olive oil, plus extra for drizzling
3-4 tsp balsamic vinegar, to taste
salt and freshly ground pepper
crusty white Italian-style bread, sliced
4 garlic cloves, halved

1. Score a cross at the base of each tomato and place in a large bowl. Pour boiling water over the tomatoes and let sit for 10 seconds. Then transfer to cold water.
2. Remove from water, and peel skin away starting from the cross.
3. Cut in half and scoop out the seeds with a teaspoon.
4. Finely dice the flesh, then combine with the finely chopped garlic, extra virgin olive oil, basil, balsamic vinegar and seasoning.
5. Toast the bread and while still hot, rub with the cut side of a garlic clove. Drizzle a little oil over each slice and season with a little salt and pepper.
6. Top with the tomato mixture and serve.


Enjoy :)

Ladybird x

Tuesday 22 June 2010

Alice in Wonderland Cupcakes


Last week I was honoured with the task of making 21st birthday cupcakes for a colleague's daughter, Alice. Alice (a befitting name!) is a big Alice in Wonderland fan, and she celebrated her milestone birthday with an Alice on Wonderland themed party.

The cupcakes were a big hit and, most importantly, they brought a big smile to the birthday girl's face :)


In designing the set, I did some research about the story as it was so long since I had read it. I also remembered a recent NQN post.

Clocks, teacups, toadstools, hearts, rabbits - just some of the iconic imagery from Alice in Wonderland.

Toadstool

Wonky Clock

Queen of Hearts

The cupcakes were a mixture of chocolate and vanilla and to ensure the cupcakes stayed moist for the party, I topped them with ganache and allowed them to set for several hours before decorating with fondant.

Ganache is so wonderful on cupcakes and it is very easy to make. You just need to give yourself some time for it . Here are my own ganache recipes for you to try. The sweetness of the white chocolate ganache is balanced out with the vanilla bean, and the chocolate ganache is lovely and rich without being bitter.

White chocolate and vanilla bean ganache
1/2 c pure cream
300g white chocolate, finely chopped
1 tsp vanilla bean paste

1. Place the chocolate in a heatproof bowl.
2. Heat the cream to boiling point then remove from heat.
3. Pour the cream over the chocolate and stir until combined, then add the vanilla bean paste.
4. Allow to cool and set (ideally) overnight.

Rich chocolate ganache
1/2 c pure cream
110g dark chocolate (I use 70% cocoa)
90g milk chocolate

1. Place the chocolate in a heatproof bowl.
2. Heat the cream to boiling point then remove from heat.
3. Pour the cream over the chocolate and stir until combined.
4. Allow to cool and set (ideally) overnight.

A few tips
  • You can store extra ganache in the fridge for up to a week, but ensure your cream has at least a week's shelf life from the date you use it. Then when you need to use it, remove it from the fridge and soften it by warming it up in short bursts (10 - 15 seconds) in the microwave.
  • If you are make a larger amount of ganache, you can store it in the freezer in smaller containers. Then just take it out and let it come up to room temperature before you need to use it. You can then soften it in the same way you would if it were straight out of the fridge.
  • If you want to pipe ganache over cupcakes, it can be whipped. Just be careful not to take it too far.. Stop as soon as it reaches the desired consistency and before it starts losing its gloss.


Happy baking, everyone :)

Happy birthday once again, Alice - I'm glad you enjoyed the cupcakes!


Ladybird x

Friday 18 June 2010

Lemon Liqueur Macarons


These are the second batch of macarons I've made, and (it must be said) a vast improvement on my first attempt, but still a long way off from being right. Learning how to make macarons is a frustrating process! In my paranoia about overmixing the batter, I ended up undermixing and so the batter was quite lumpy and difficult to pipe. Edible and tasty, but not very aesthetically appealing... But also one step further towards a perfect macaron :)
As a result of my mistakes in the first batch, I learnt a lot about how to make macarons and now a bit more confident in setting about making these little french delicacies again in future. I have also learnt a lot from reading online. The wealth of knowledge and experience available via the Internet never ceases to amaze me - it's incredible!


I love anything lemony, so I enjoyed these little lemon liqueur macarons. I made mine a little too fat, but made smaller this recipe makes 16 complete macarons.

From The Australian Women's Weekly: Macaroons & Biscuits.
Ingredients
3 eggwhites
1/4 c (55g) caster sugar
yellow food colouring
1 1/4 c (200g) icing sugar
1c (120g) ground almonds
2 tsp finely grated lemon ring
1 tbsp icing sugar, extra
1/4 c pouring cream
150g white chocolate, chopped coarsely
4 tsp limoncello liqueur

Method
Macarons

1. Grease oven trays and line with baking paper.
2. Combine the ground almonds and icing sugar and sieve twice. Set aside.
3. Beat eggwhites slowly and then gradually increase speed until soft peaks form. Add caster sugar a spoonful at a time and a few drops of the food colouring, beat until the sugar dissolves. Fold in sifted icing sugar, ground almonds and rind in two batches.
4. Spoon mixture into piping bag fitted with 2cm plain tube. Pipe 4 cm rounds about 2 cm apart onto trays. Tap trays on bench so macarons spread slightly. Dust macaroons with extra sifted icing sugar. Stand 30 minutes.
5. Meanwhile, preheat oven to 150 degrees Celsius.
6. Bake macarons about 20 minutes until crisp, but not coloured. Cool on trays.

Ganache
1. Bring cream to the boil in a small saucepan, remove from heat, add chocolate, stir until smooth. Stir in liqueur, stand at room temperature until spreadable.
2. Sandwich macarons with filing.


Tips
- Age the eggwhites overnight. I let mine sit out of the fridge in a small container (winter here at the moment, so no problem).
- Beating the eggwhites slowly and then increasing the speed strengthens the eggwhites.
- Don't be afraid of being too rough with the batter. It is important to fold the mixture, but it is more important to achieve a nice smooth batter. When recipes say "it should flow like magma" (which, I feel, is an obscure and frustrating comparison!), they mean it should ooze in slow motion when you tip the bowl to the side.
- To remove any piping peaks (or 'nipples' as I have heard them referred to as in my reading!), dip a finger in water and gently pat the top of the macaron. I forgot to do this step, so otherwise I think the tops would have been smooth. 
- Sandwich macarons just before serving to avoid sogginess.


Until next time readers :) Happy baking

Ladybird x

Wednesday 16 June 2010

Fig and Goat's Cheese Pizza topped with Rocket and Balsamic Glaze


Watching the recent vegetarian challenge on Masterchef, I was inspired by Claire and Jonathon's fig and goat's cheese dish. I felt that the flavour combination would translate well into a pizza, so I gave it a try, and it was very successful :)

An original Ladybird creation. Per pizza (serves 1):
Ingredients
1 greek pitta bread*
2 tbsp passata
30g goat's cheese, crumbled
30g mozzarella, grated
1.5 figs, thinly sliced
handful rocket
extra virgin olive oil
balsamic vinegar
salt and pepper to taste

* I imagine a homemade pizza base would be beautiful with these toppings, but Greek pitta breads make for a quick and easy alternative. They also go beautifully crispy once baked.

Method
1. Place pitta on a tray and top with the passata and season.
2. Arrange the fig slices and the cheeses. Season and drizzle with a little olive oil.
3. Bake at 200 degrees celsius for about 20 minutes or until golden.
4. Top with rocket and drizzle with a little extra virgin olive oil and balsamic vinegar.
5. Serve immediately.

For a slight variation, you could add proscuitto if you wanted to.


I am not a big fig eater but I am totally won over with this combination. The caramelisation and sweetness of the fig beautifully offset the strong flavour of the goat's cheese, and the rocket and balsamic added an extra kick of flavour. Yummy :)


Ladybird x

Sunday 13 June 2010

Classic Chocolate Ice Cream


When food blogging I am conscious of hyperbole, and try to use it sparingly. On this occasion, I simply cannot restrain myself - this is the best chocolate ice cream ever! It is rich, decadent, and oh so velvety... almost too good to share! I admit, I do hesitate when serving this to guests at home.. I think it's my inner ice cream demon saying "No! It's mine!" To counter the demon's taunts, I make sure I have a stash of this ice cream in the freezer at all times :) Then everyone's happy!

This is an adapted recipe from the instruction booklet that came with my Sunbeam 'Snowy'. In don't usually try recipes that come in appliances' instruction manuals, but I have found these recipes to be very reliable. This makes approx. 1 L and there's no telling how long it will last...

Ingredients
1 cup full cream milk
2 cups double cream
150 g dark chocolate (I used Lindt 70% cocoa)
4 egg yolks
130 g caster sugar

Method
1. Stir milk, cream and chocolate in a saucepan over a medium heat until the chocolate melts; increase heat and almost bring to the boil.
2. In a large bowl whisk egg yolks and sugar until well combined. The mixture should become creamy and pale in colour, as depicted below.


3. Slowly whisk hot chocolate mixture into yolk mixture until well combined.


4. Place the bowl of a pot of simmering water (water not touching the bowl), and cook over a low heat until the mixture has thickened and coats the back of a wooden spoon.


5. Transfer to a large bowl and allow to cool before covering and placing in the fridge to chill for several hours.
6. Churn in ice cream machine for about 30 minutes then transfer to a container and place in the freezer.
7. To serve, transfer to the fridge about 20 minutes prior to serving.


If you don't own an ice cream machine, I would recommend considering getting one. You really can't compare homemade ice cream to the bought stuff... It's superb! Hand on heart, getting an ice cream machine is probably the best $50 I have ever spent. Again, sorry about the hyperbole, but it's true!!!


Ladybird x

Monday 7 June 2010

Barmuda Café, Newtown


Barmuda Café in Newtown holds a special place in my heart. I'm being soppy, I know.. But let me tell the story!

A couple of years ago I visited the café for the first time during a trip to Sydney with Mr Ladybird. At the time we were living in Brisbane and thinking about heading south to make a fresh start in a new city.

During our trip we were staying in Australia St, Newtown and were looking for a place to enjoy a good coffee and some breeakfast. We quickly stumbled upon Barmuda Café and the smells of fresh coffee and breakfast invited us inside.


It was during our first breakfast together at Barmuda that we seriously discussed the possibility of moving to Sydney. Maybe it was the diverse vibe of Newtown that attracted me. Or maybe it was the ambience of the cafe. Or maybe, just maybe, it was the taste of these ricotta hotcakes that sweetened the prospect. At any rate, we decided that a move to Sydney would be a very good idea... And so I now fondly refer to these Ricotta Hotcakes as.. The Life Changing Hotcakes. A big call, I know, but it's not that far-fetched! Beside the life changing factor, they are very nice, with oozy blobs of soft ricotta throughout...

Ricotta Hotcakes with Berry Compote and Maple Syrup

So now that we live in Sydney, we try to make it back to Barmuda occasionally. Unfortunately, the Newtown traffic and parking situation is a slight deterrent, but I'm always glad when we return.

Lattés

Mr Ladybird enjoyed his favourite cooked breakfast with all the trimmings... including a fantastic, crunchy potato cake (far better than any processed hashbrown out there!)

Planet Newtown


Mr Ladybird got to catch up on his World Cup reading over coffee , and I was happy to watch Newtown locals going about their day and take some photos. Check out this adorable little boy and his puppy :)


All in all a nice breakfast on a (at long last!) sunny winter morning at one of my favourite cafés in Sydney's inner west.
 
I forgot to take note of the prices of our coffees and dishes. However as an estimate, coffees are average price (about $3.50). Breakfast dishes are between $10 to $15.
 
Barmuda
283 Australia St
Newtown
(02) 9516 3341


Barmuda on Urbanspoon
Ladybird x
Related Posts with Thumbnails