Hello dear followers...
It's been a very busy couple of weeks recently with some great orders, and I have also been busy finalising my website which is now LIVE!
To check it out, please visit: www.annatrivedicakes.com.au
Here are some recent additions to my portfolio...
This was a special order... the cake was eggless vanilla, and I made around 100 matching red velvet and chocolate cupcakes.
A 35th anniversary corporate order for the Australian Graduate School of Management (AGSM) at the University of New South Wales (UNSW).
A cute, diagonally striped cake.. and this soccer ball birthday cake in my delicious new flavour 'Caramel Lover' - caramel mud cake, salted caramel buttercream and chocolate ganache - mmmm! :)
A Ninjago themed chocolate cake for a little person...
And finally another addition to my bug themed monogram cakes... this time with pink and raspberry red stripes and ladybirds (of course!)
And two simple and elegant wedding cakes... Oh how I LOVE wedding cakes... hoping to make some more soon, so fingers crossed! :)
Stay tuned for another update soon! Have a great week everyone, and HAPPY SPRING! :)
Anna x
Showing posts with label RTR fondant. Show all posts
Monday, 3 September 2012
Sunday, 22 July 2012
This week in review
Phew! At last a day to put my feet up and spend some time with my family :) It's been a very busy week. I completed a fantastic training course, made a few small cakes and have been busy with business admin stuff. Ahhhh admin, the boring yet necessary part of my new business. Anyway, here are few snaps for you all...
First, my 'Little Bee Cake'...
And then this Ninjago cake for a young Lego ninja loving client client...
Finally, here are the results from my training course at Handi's Cakes this week. I created this double barrel, two tier cake with a beautiful pearl lustre finish and sugar magnolias. I love love love making sugar flowers... I may have found a new vice!
The original plan was to add some piping detail to the bottom tier, but once I had applied the lustre finish I felt it already looked so elegant that it really did not need it in addition to the flowers. As you can see in the picture below, when the light hits the finish it looks so pretty (and even prettier by night!). This cake makes me want to get married again - such a classy look!
That's all from me for now...
If you haven't already liked my business page and you'd like to follow what I'm up to, here is the link: https://www.facebook.com/annatrivedicakes
Enjoy the rest of your weekend, everyone :)
Anna x
First, my 'Little Bee Cake'...
And then this Ninjago cake for a young Lego ninja loving client client...
Finally, here are the results from my training course at Handi's Cakes this week. I created this double barrel, two tier cake with a beautiful pearl lustre finish and sugar magnolias. I love love love making sugar flowers... I may have found a new vice!
The original plan was to add some piping detail to the bottom tier, but once I had applied the lustre finish I felt it already looked so elegant that it really did not need it in addition to the flowers. As you can see in the picture below, when the light hits the finish it looks so pretty (and even prettier by night!). This cake makes me want to get married again - such a classy look!
That's all from me for now...
If you haven't already liked my business page and you'd like to follow what I'm up to, here is the link: https://www.facebook.com/annatrivedicakes
Enjoy the rest of your weekend, everyone :)
Anna x
Labels:
Cake,
RTR fondant,
weddings
Saturday, 7 July 2012
Ballerina Bear Cake
I have been busy at work this week experimenting with cake flavours and rather than letting the cakes go to waste, I have been using them to practise some new designs and figurines. My favourite of the week is this cute six inch Ballerina Bear cake. Next time I make this design I think I'll incorporate a little tulle tutu to turn her into a true prima ballerina bear!
And to turn girly into ueber-girly, I opted for some very feminine and fragrant flavours for the cake. This was a cardamom-spiced butter cake brushed with a rosewater sugar syrup, then layered and covered in saffron infused white chocolate ganache. Cutting into the cake smelled like heaven, and it tasted as pretty as it smelled!
I aim to offer a great range of flavours in my cakes - from the classic to the modern. May no flavour be left unturned in pursuit of cakely perfection! With my 300 plus followers out there, who better to ask about cake than you!
So tell me, dear readers, what sort of flavours would you like to enjoy in a cake at a special celebration? I look forward to reading your replies :)
Anna x
PS - If you like what you see here, why not follow me on Facebook? www.facebook.com/annatrivedicakes
Labels:
Cake,
RTR fondant
Monday, 2 July 2012
Anna Trivedi Cakes
Hi everyone,
It's been a while since my last update - tut, tut, tut! Well I have been quite busy between one thing and another. Looking after The Emperor keeps me busy on one hand, but I have also been hard at work at starting my own cake business! Yes, I have decided to get a bit more serious about making cakes. I thought it was about time I stop talking about doing it and actually DO it!
Here are some pictures of my recent work...
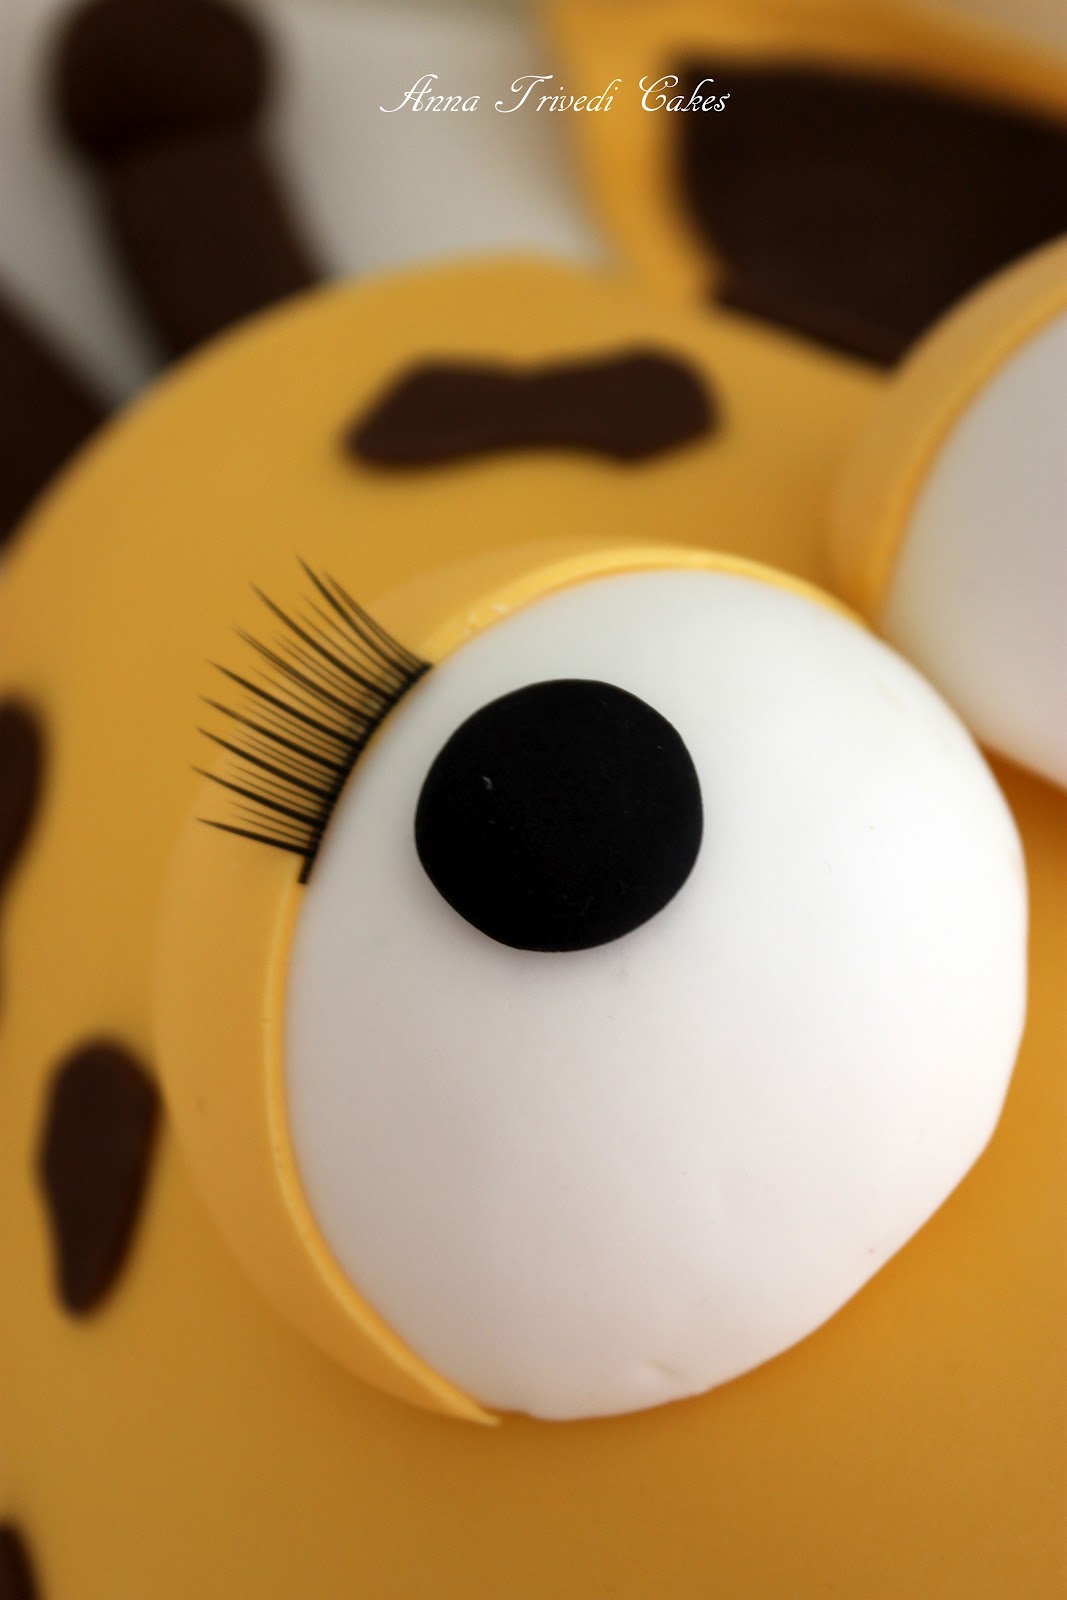
I called this beautiful giraffe 'Sophie' after The Emperor's much-loved (and chewed) teething toy. Sophie was made complete with beautiful lashes and a cheeky tongue! This was a cake I made as part of some of my recent training at Planet Cake in Balmain, and was donated to the Ronald McDonald House in Randwick. The kids were thrilled to bits to enjoy such a fun chocolate cake for dessert :)
I've also been making some birthday cakes for children in my mothers' group recently. This drum cake was for a little boy of Swedish heritage, so it was befitting that blue and yellow be included in the design.
And another first birthday cake. This one based on the popular children's book 'The Very Hungry Caterpillar'. I read this book to The Emperor every night before he goes to sleep so I am very familiar with the story. Making all the little food figurines in reference to the book was a lot of fun.
That's all from me for now, but hopefully it will not be too long before I update again with more cake shots!
Anna x
It's been a while since my last update - tut, tut, tut! Well I have been quite busy between one thing and another. Looking after The Emperor keeps me busy on one hand, but I have also been hard at work at starting my own cake business! Yes, I have decided to get a bit more serious about making cakes. I thought it was about time I stop talking about doing it and actually DO it!
Here are some pictures of my recent work...
I called this beautiful giraffe 'Sophie' after The Emperor's much-loved (and chewed) teething toy. Sophie was made complete with beautiful lashes and a cheeky tongue! This was a cake I made as part of some of my recent training at Planet Cake in Balmain, and was donated to the Ronald McDonald House in Randwick. The kids were thrilled to bits to enjoy such a fun chocolate cake for dessert :)
I've also been making some birthday cakes for children in my mothers' group recently. This drum cake was for a little boy of Swedish heritage, so it was befitting that blue and yellow be included in the design.
And another first birthday cake. This one based on the popular children's book 'The Very Hungry Caterpillar'. I read this book to The Emperor every night before he goes to sleep so I am very familiar with the story. Making all the little food figurines in reference to the book was a lot of fun.
That's all from me for now, but hopefully it will not be too long before I update again with more cake shots!
Anna x
Labels:
Cake,
Charity,
Planet Cake,
RTR fondant
Tuesday, 26 July 2011
The WWE Wrestling Cake
This World Wrestling Entertainment (WWE) cake was for young James who turned 8 last week - he is a BIG wrestling fan, so a wrestling cake was an obvious choice for the occasion.
It was a lot of fun resarching and making this cake - never have I paid so much attention to wrestlers' oompa loompa like skintone, oh-so-stylish mullets, and their equally dapper costumes!
This was my first time at creating figurines for a cake.. a little daunting, but I was happy with the result for a first attempt, especially with the little details such as their six-packs and burly muscles.
But the best part of all...? James's reaction to his cake as captured by his mum on camera and shared with me the next day - now there's a little grin that made it all the more worthwhile :)
Till next time,
Ladybird x
PS - I've had a couple of enquiries about cake orders this month so I thought I'd just make a general announcement regarding this through my blog... Yes, I am definitely open to doing cake/cupcake orders in the Sydney area :) If you are interested and would like to get in touch with me, please email me at diaryofaladybird[at]gmail[dot]com.
Labels:
Cake,
RTR fondant
Thursday, 14 July 2011
The joy of creating birthday cakes
It is always an honour to be asked to make a cake for someone for a special occasion, but to be asked to create a cake celebrating someone's birthday is truly special... A birthday marks the day you made your debut to the world - and there is only one of you in the whole world, so what a special debut it is! It is for this reason that I genuinely love creating birthday cakes and cupcakes for others, regardless of whether I know the birthday girl/boy personally or not. I do love the feel good vibe of being involved in a happy occasion, even if it is in a very small way by making a cake...
I recently had the pleasure of making this birthday cake for a relative celebrating her 20th birthday. The brief was simple and to the point. Flavour? chocolate. Colour? red. Simple briefs like that are some of my favourite because they just beg for a little creative thinking. In this case, I created a 7 inch eggless chocolate cake layered with a lovely milk/dark chocolate ganache. I then decorated it with RTR fondant in a 50s inspired polka dot and bow theme for a girl who loves the colour red... Her smile upon seeing it was well worth the effort :)
Here is my 'go to' recipe for a lovely eggless chocolate cake - a must in a baker's repertoire in case of allergies or eggless preference orders!
Eggless Chocolate Cake
An adpated recipe from Divine Taste
Ingredients
200 gm (1 1/2 cups) plain flour
50 gm (1/4 cup) cocoa powder* 2 tsp baking powder
1 tsp baking soda/ sodium bicarbonate
4 teaspoons caster sugar
1 tin/400gm sweetened condensed milk
150g unsalted butter, melted
2 tsp good quality vanilla essence
150 ml water
* I have had most success with 'Cadbury's Bournville Cocoa' from the supermarket. My trials with richer cocoa powders such a dutch cocoa powder have been unsuccessful.
Method
1. Preheat the oven to 100 - 120 degrees celcuis. Grease and line the bottom of a round cake tin with greaseproof paper/baking parchment/butter paper. I used a 7 inch cake tin, but an 8 or 9 inch would work equally well.
2. Into a mixing bowl, sift the flour, cocoa powder, baking powder, baking soda and sugar. Whisk together briefly to ensure a uniform mixture.
3. Add in the condensed milk, melted butter, vanilla essence and water. Beat with an electric hand mixer, whisk or spoon just until the mixture is uniform and smooth and there are no lumps. This shouldn’t take more than a minute with an electric hand mixer/beater. Be careful not to over beat as this tends to stiffen the batter which might result into a harder textured cake.
4. Pour the batter into the cake tin and bake for an hour at 150 degree celcius.
5. Turn out onto a wire rack to cool completely, then ice/decorate as desired.
Tip: When baking cakes without eggs, it is essential to ensure you cake is cooked all the way through before removing it from the oven. Failure to do so will sadly result in a sunken cake... To avoid this, do a cake skewer test in the centre of the cake, even if you're confident it's cooked properly.
And voila, a beautiful chocolate cake - here is an innards shot!
Of course, the overall result with the flavour was enhanced by both the sugar syrup and chocolate ganache I used in assembling the cake before covering it with fondant. For your reference, here are the recipes to each of these.
Sugar Syrup
Recipe from the Planet Cake book by Paris Cutler
100g apricot jam
100ml boiling water
2 teaspoons Cointreau (optional)
- Whisk together the jam and hot water in a small bowl, then pass through a sieve to remove any lumps. Once cool, stir in the liqueur and use as required.
- Some people like to brush layers of cake with a pastry brush, however, I often prefer a small (and of course, clean) spray bottle - it's quick, easy, and no risk of brush fibres being left behind in the cake!
Milk/dark chocolate ganache
This is an original Diary of a Ladybird recipe which I believe is ideal for cakes/cupcakes for children or those who don't like dark chocolate very much)
400g dark chocolate, finely chopped
400g milk chocolate, finely chopped
2 cups pure cream
1. Place the chocolate in a heatproof bowl.
2. Heat the cream to boiling point then remove from heat.
3. Pour the cream over the chocolate and stir until combined.
4. Allow to cool and set (ideally) overnight.
Tips
- You can store extra ganache in the fridge for up to a week, but ensure your cream has at least a week's shelf life from the date you use it. Then when you need to use it, remove it from the fridge and soften it by warming it up in short bursts (10 - 15 seconds) in the microwave.
- If you are make a larger amount of ganache, you can store it in the freezer in smaller containers. Then just take it out and let it come up to room temperature before you need to use it. You can then soften it in the same way you would if it were straight out of the fridge.
Until next time, dear readers...
Ladybird xxx
Labels:
Cake,
Chocolate,
Eggless baking,
RTR fondant
Thursday, 7 July 2011
Ladybird Cupcakes
I can't believe I've been blogging for almost 2 years now and have never made Ladybird Cupcakes before now! Well today's post addresses this most despicable oversight in Diary of a Ladybird's archives, and hopefully this mini-tutorial will guide you through how you can make them too.
The inspiration for these comes from the Planet Cake decorating book by Paris Cutler.
Bake your cupcakes
Bake your cupcake of choice. I chose my favourite chocolate cupcake/cake recipe, but you could also go for a classic vanilla cupcake.
Ganache the cupcakes
Using your ganache of choice, roughly ganache the tops of the cooled cupcakes. Allow to set for at least half an hour, then smooth over with a palette knife dipped in hot water to create a perfectly smooth and even cupcake surface. Allow to set for at least an hour, and once dry to touch they are ready for decorating.
Cover with black fondant
To cover and decorate the fondant you will need black and red fondant, as well as a very small amount of white fondant. Roll out your black fondant to a 3mm thickness, and cut out circles with a circle cutter to fit the top of your cupcakes. Lay and smooth the fondant on top of the cupcake.
Decorate with fondant
Now the fun part of decorating begins! Thinly roll out your red fondant and using the same circle cutter you used for the black fondant, cut out the same number of red circles. Then using the cutter, cut a small piece out of the circle, then split the larger portion in half with a sharp knife. The picture below should hopefully explain what I mean here...
Using the two larger pieces, dab/brush a small amount of water on the reverse of each and lay them on top of the cupcakes with the red pieces (wings) splayed apart slightly. Discard the remaining piece of red fondant.
Using a small circle cutter, cut out the ladybird spots from some rolled black fondant and attach them to the wings with a tiny amount of water dabbed beneath each spot.
Make the final touches
To make the ladybirds' eyes, roll tiny balls of white fondant and attach them to the cupcake (with a tiny touch of water if necessary). For the pupil in each, use a very fine paintbrush and a little black food dye.
Finally, press part of the end of a plastic straw (or a clean plastic pen cap) to create the smile indent in each ladybird's face.
So there you have it - simple and beautiful ladybird cupcakes. I don't know about you, but I find their little faces so cute that I can't help but smile back at them! :)
Ladybird x
PS- Remember my salted caramel, peanut and chocolate tarts? I've entered my recipe into the Lurpak Callenge and I'd really appreciate your support in the final days of voting. To vote for my original recipe, please click here!
Labels:
Chocolate,
Cupcakes,
Ladybirds,
Planet Cake,
RTR fondant
Monday, 29 November 2010
Couture Cake Class
First we were all provided with our cake, ready to be cut into 3 even(ish) layers and then brushed with syrup and ganached between the layers.
Creating a perfectly(ish, again!) ganached cake takes time, but it is important. During the class, Louise provided us with lots of tips and guidance to ensure a good foundation for the really fun part - decorating wtih fondant!
We then brush our cakes all over with syrup before moving on to colour our fondant ready for decorating.
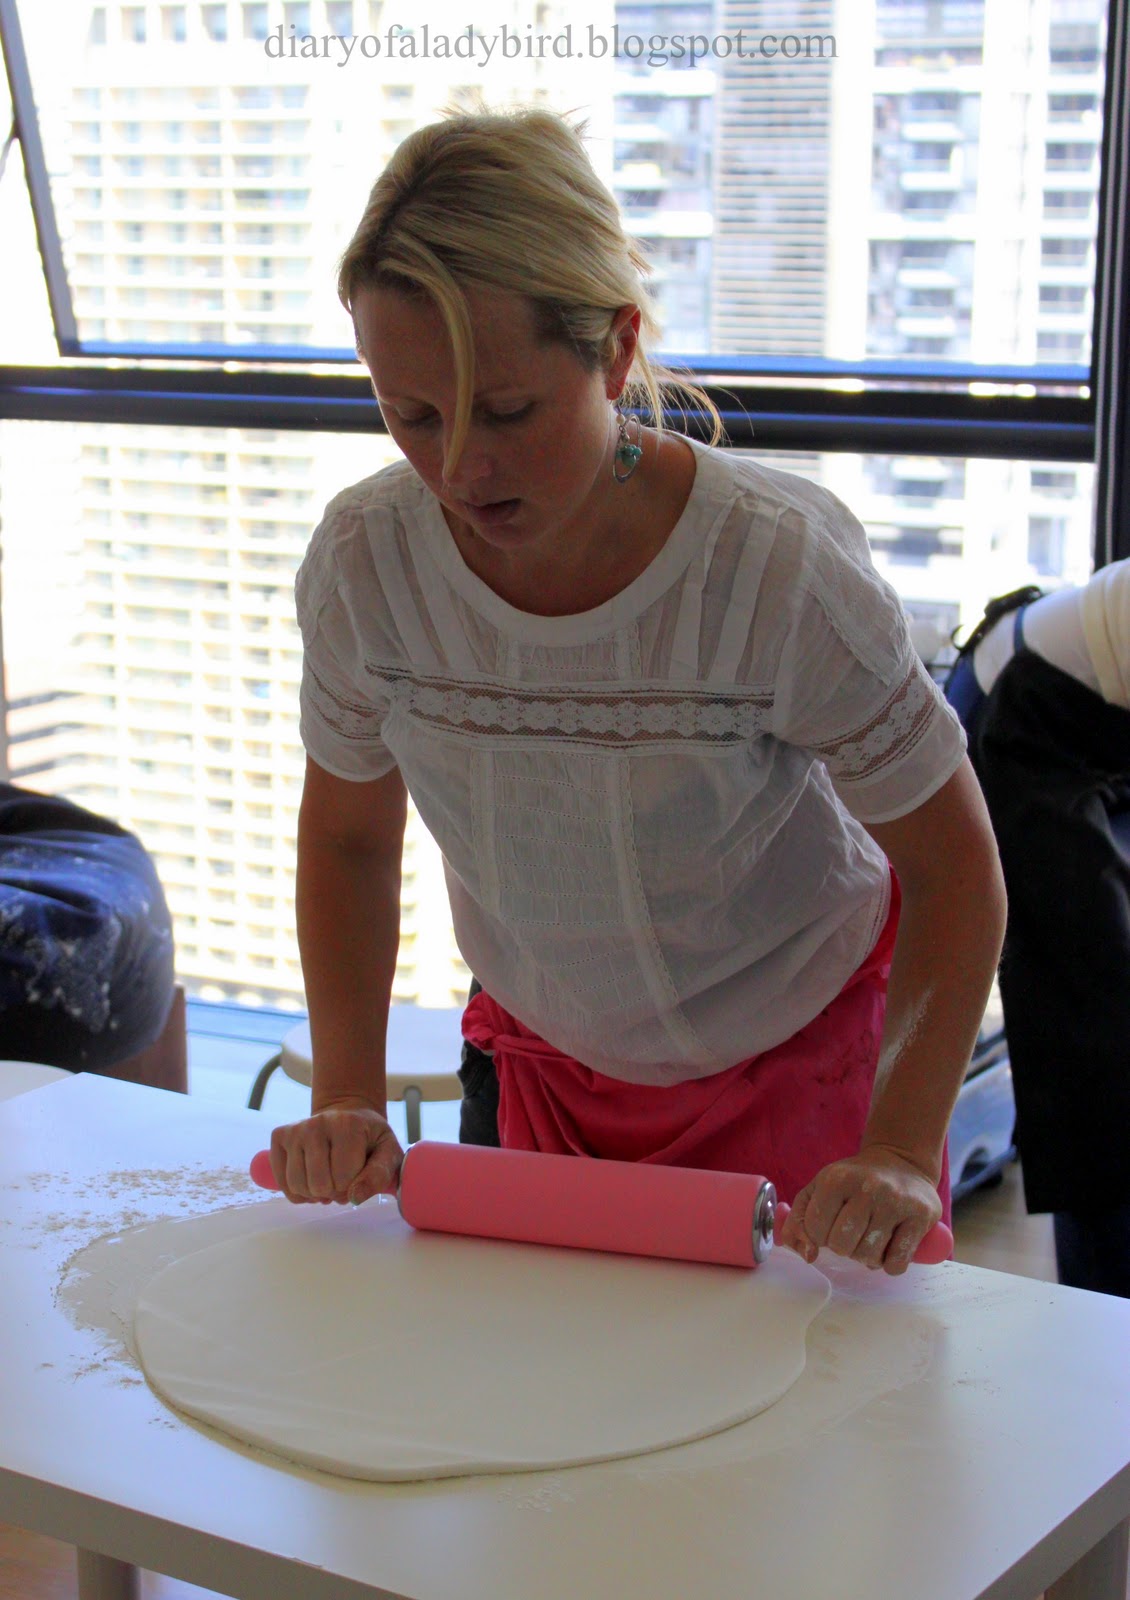
We then roll out the white fondant to cover the cake before decorating with coloured fondant. We buff and smooth, buff and smooth until we have a nice even surface.
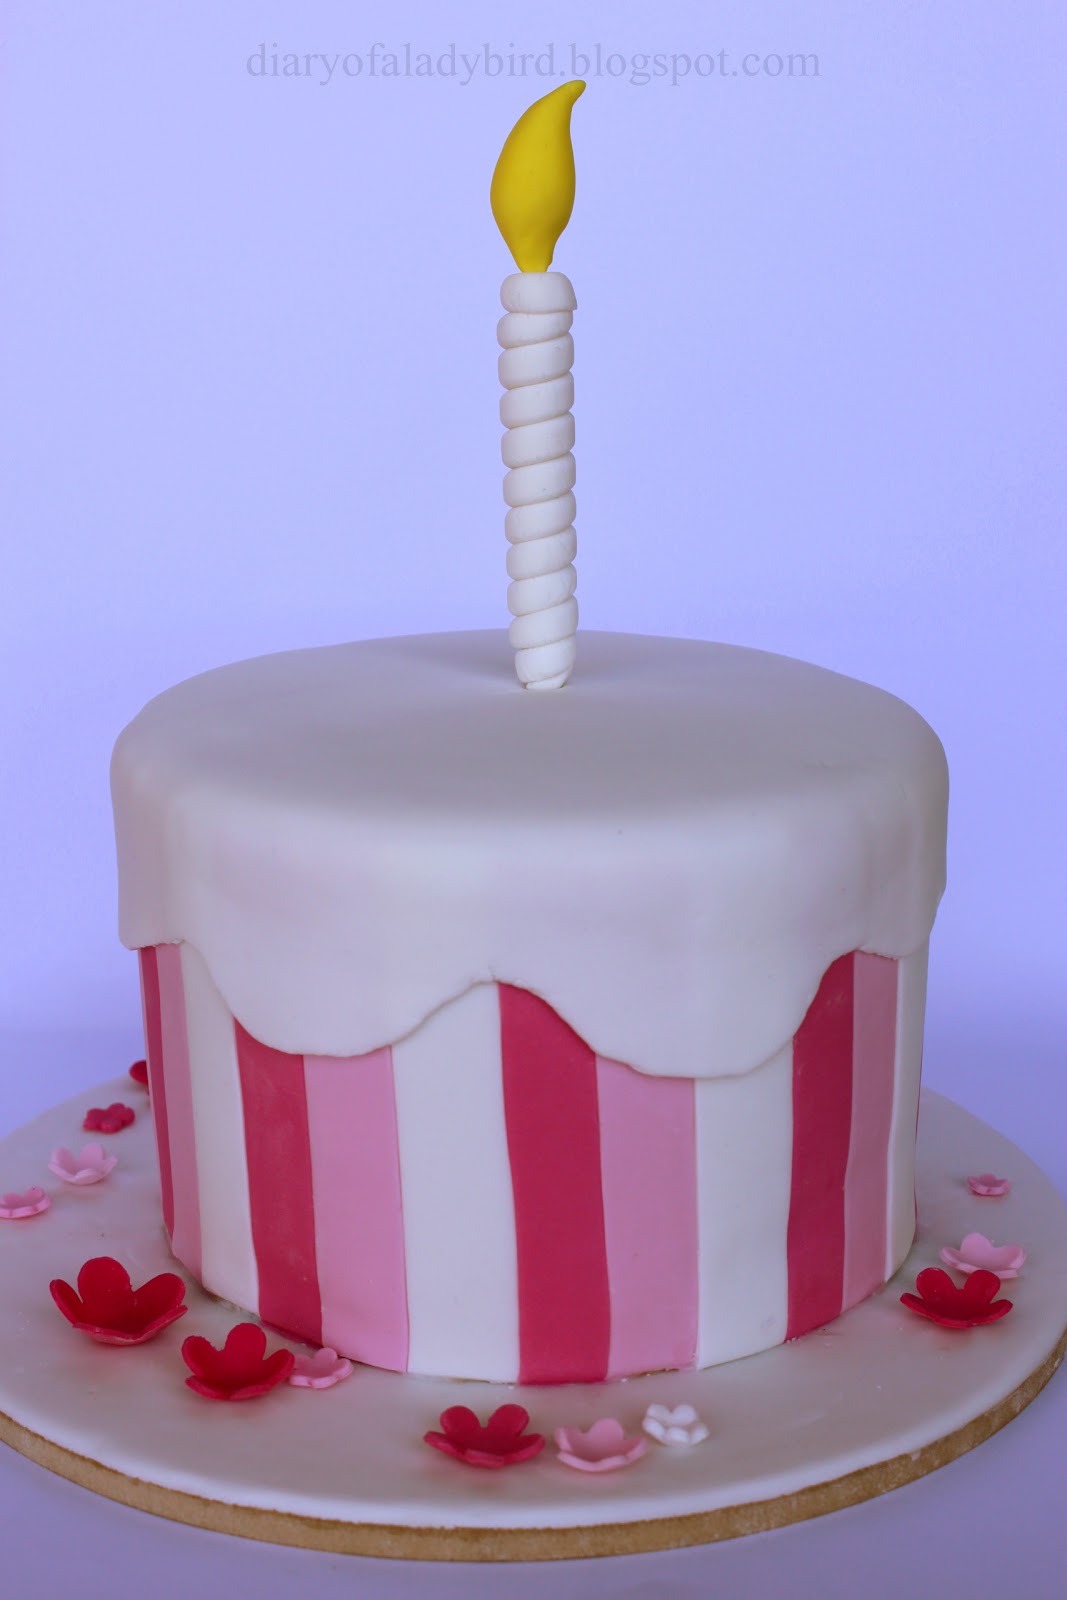
Then we transfer the cake to our fondant covered cake board and get set for adding the stripes and melted wax effect top.
Finished with a candle created by twisting thin fondant rolls around a bamboo skewer, our cakes are finished! It was a great feeling of accomplishment as everyone stood back and admired their work.
Thanks again to Sharon, Louise and Lilia for hosting such a wonderful and educational cake experience!
If you'd like to find out more about Couture Cake Classes, why not check them out at their stall at the upcoming MasterChef Live Australia event in Sydney from December 10-12 where they will also be running free cupcake decorating demonstrations.
PLUS thanks to Couture Cake Classes, readers of Diary of a Ladybird are eligible for a 10% discount on classes! To be eligible simply enter the promotional code 'ladybird' when you sign up for a class. The 2011 class schedule is out now, so check it out!
Couture Cake Classes
Sydney, NSW
http://www.couturecakeclasses.com.au/
*** Ms Ladybird attended this class as a guest of Couture Cake Classes ***
Labels:
Cake,
Cooking classes,
RTR fondant
Subscribe to:
Posts (Atom)