Showing posts with label Cupcakes. Show all posts

Thursday, 25 August 2011

Nutella Lovers' Cupcakes


A few of you lovely readers requested the recipe for the Nutella cupcakes from my cookbook of the month for August - The Crabapple Bakery Cupcake Cookbook, and so I am only too happy to oblige!

I made these as part of my selection for RSPCA Cupcake Day recently and there were a popular choice! It's amazing how many people (or particular, women) swoon at the very mention of 'nutella'. There's just something about it I guess. Personally speaking, it's something I avoid keeping in my pantry cupboard as it is just too dangerous. It all starts out innocent with a teaspoonful just to get a taste, then it's a piece of white toast with some of that delicious hazelnut-chocolate spread smeared on top.. and before you know it the whole jar's empty! Irresistibly evil....


This recipe comes from The Crabapple Bakery Cupcake Cookbook. The great thing about this recipe is that the cupcake itself is quite light, so combined with the rich icing the result is not too over the top Nutella. The recipe and makes between 24 and 30 cupcakes. They will keep for 2 days and freeze for 2 months.

Hazelnut Cakes

2 & 3/4 cups plain flour
2 teaspoons baking powder
1/2 teaspoon salt
200g softened unsalted butter
1 & 3/4 cups caster sugar
4 eggs
1 tablespoon vanilla extract
1 cup natural yoghurt
1/2 cup hazelnut meal

1. Preheat oven to 170 degrees Celsius. Line two 12-hole muffin trays with cupcake liners of choice.

2. Sift together the flour, baking powder and salt.

3. In a separate bowl, cream the butter for 1-2 minutes. Add the caster sugar a third at a time, beating for 2 minutes after each addition. After the last addition, beat until the mixture if light and fluffy and the sugar has almost dissolved. Add eggs one at a time, beating for 1 minute after each addition or until mixture is light and fluffy. Add the vanilla extract and beat until combined.

4. Add a third of the flour mixture to the creamed mixture and beat on low speed until combined. Add half the yoghurt and beat until combined. Repeat this process. Add the remaining third of the flour and beat until thoroughly combined; do not over-beat as this will toughen the mixture. Add the hazelnut meal and beat until combined.

5. Spoon mixture into cupcake papers, filling each about three-quarters full. I like to use a levelled off ice cream scoop to quickly and evenly divide the mixture. Bake for 18-20 minutes or until a fine skewer inserted comes out clean. Remove cupcakes from the trays immediately and cool on a wire rack for 30 minutes before frosting.

Nutella Frosting

1 x 750g jar Nutella
1 tablespoon Frangelico (optional)
1/2 cup whipped cream

1. Spoon the Nutella into a bowl and stir in the Frangelico.
2. Put the whipped cream into a small bowl and fold ina quarter of the Nutella mixture.
3. Then fold the whipped cream mixture into the remaining Nutella.

Note: Above is the original frosting recipe from the book, however, I struggled with this. As it was a cold evening when I was making this, I ended up sitting the nutella jar in hot tapwater before transferring its contents to a bowl. I also had difficulty combining the nutella, frangelico and cream all together and ended up using a stick blender to combine the three ingredients sufficiently to achieve a spreadable consistency. I piped mine onto the cupcakes and topped with crushed hazelnuts. Sooo... you may need to improvise a little with the frosting recipe to make it work for you...  Alternatively - here's an idea I think I'll be using next time: Drizzle a little frangelico over the cupcakes and then frost with straight Nutella! :) Yum!


Tell me, dear readers, does Nutella do it for you?

Ladybird xxx

Monday, 15 August 2011

RSPCA Cupcake Day 2011


Today was my third year of participation in the RSPCA Cupcake Day, and it was a success once again... Thanks to the support of my family, friends and colleagues I raised $360 for the RSPCA! Hurrah, and a big thank you to everyone for their support of this wonderful cause :)

Vanilla cupcake with vanilla buttercream


This year I decided to keep my cupcakes simple, but no less delicious. I made my usual favourite chocolate cupcakes topped with ganache, as well as something new - a lovely Nutella cupcake which went down a treat with my fellow Nutella-addict friends. The recipe comes from this The Crabapple Bakery Cupcake Cookbook - if you are keen for me to do a post on this recipe, please let me know!

'Nutella Lovers' cupcake

I also offered vanilla cupcakes with four different butter cream flavours - vanilla, strawberry, lavender and passionfruit. And because I'm not at all a fan of essences (oh don't even get me started!), I used all natural ingredients to create scrummy flavours. My favourite of the four was the strawberry buttercream - Mmmmm!

Vanilla cupcake with lavender buttercream

Vanilla cupcake with passionfruit buttercream

Vanilla cupcake with strawberry buttercream

Here is my recipe for you, my lovely readers...

Ladybird's Strawberry Buttercream (enough to generously top a dozen cupcakes)

an original Diary of a Ladybird recipe

125g unsalted butter, at room temperature
pinch of salt
2 cups icing sugar
1 teaspoon vanilla extract
250g punnet strawberries, washed and hulled
2 tablespoons caster sugar, plus extra to taste
1 tablespoon lemon juice, plus extra to taste
pink food colouring (optional)

1. First start on the strawberry syrup that will flavour the buttercream. Blitz the strawberries to a fine puree. Combine in a a small saucepan along with the caster sugar and lemon juice. Stirring occasionally, bring to a simmer over low-medium heat. Reduce to low heat and stir frequently until the liquid has reduced to a thick syrup. Taste as you go, adding more lemon juice / caster sugar as required. Pass the syrup through a fine sieve and set aside in the fridge to cool.

2. Now start on the buttercream. Using an electric mixer, beat together the butter, vanilla extract and pinch of salt for a minute. Then beat in the icing sugar a third at a time, mixing well and scraping down the bowl after each addition to keep the mixture light and fluffy.

3. Finally, mix in the cooled strawberry syrup until well combined. If the mixture is a little wet for spreading/piping, simply add extra icing sugar. At this point you could also add a little pink food colouring if you wanted to enhance the colour, but I find that the syrup itself gives colours the buttercream nicely.


Till next time, dear readers

Ladybird x

Saturday, 13 August 2011

Cookbook of the Month - August 2011

With RSPCA Cupcake Day fast approaching, my kitchen (and dining room!) have quickly become a crazed cupcake workshop this weekend. As I type this, my laptop is surrounded by trays of freshly baked cupcakes cooling  before they can be iced and adorned ready for sale on Monday. It's a lot of work, but I do love it.. there's just something about cupcakes that I will never tire of, and when it's for a good cause, how can I resist?!


With cupcakes on my mind, I am pleased to announce the cookbook of the month for August - The Crabapple Bakery Cupcake Cookbook by Jennifer Graham. Published in 2007 this book has been around for a little while, but there is good reason behind its popularity. Written by the famed founder and director of the now closed Crabapple Cupcake Bakery in Victoria, I would have no hesitation in recommending this book to any cupcake lover. I recently received this cookbook as a gift and I am absolutely in love with it. It is filled with delicious and easy to follow recipes, both classic and imaginative.

I am looking forward to trying all the book's recipes, but as a litmus test I have already tried the book's basic vanilla and chocolate cupcake recipes twice now. Both get the big thumbs up from me, but below I have included both recipes so that you can make up your own mind if you like. I feel that both produce a great flavour and texture, as well as that highly sought-after smooth domed top.

Each of the following recipes is supposed to make 24, but I seem to get around 27 out of each recipe when I use a levelled off ice cream scoop to divide the batter among the cupcake papers. They will keep for 2 days and freeze for 2 months. For best results, start with all ingredients at room temperature. And as I always say, choose your eggs wisely! :)

Crabapple Bakery's Vanilla Cupcakes

Ingredients

2 & 3/4 cups plain flour
2 teaspoons baking powder
200g softened unsalted butter
1 & 3/4 cups caster sugar
4 eggs
1 tablespoon vanilla extract
1 cup milk

Method

1. Preheat oven to 170 degrees celsius. Line two 12 hole muffin trays with cupcake papers.

2. Sift together the flour and baking powder. In a separate bowl, cream the butter for 1-2 minutes. Add the caster sugar a third at a time, beating for 2 minute after each addition. After the last addition, beat until the mixture is light and fluffy and the sugar has almost dissolved. Add the vanilla extract and beat until combined.

3. Add a third of the flour to the creamed mixture and beat on low speed until combined. Add half of the milk and beat until combined. Repeat this process. Add the remaining third of the flour and beat until thoroughly combined; do not overbeat as this will toughen the mixture.

4. Spoon mixture into cupcake papers, filling each about three-quarters full. Note: I use a levelled off ice-cream scoop to divide the batter quickly and evenly. Bake for 18-20 minutes or until a fine skewer inserted comes out clean. Remove cupcakes from the trays immediately and cool on a wire rack for 30 minutes before frosting.

Crabapple Bakery's Chocolate Cupcakes

Ingredients

3 cups plain flour
2 teaspoons bicarbonate of soda
1 teaspoon baking powder
1 teaspoon salt
3 tablespoons instant coffee granules
1 cup hot water
1 cup cocoa
1 cup cold water
200g softened unsalted butter
2 & 1/2 cups caster sugar
4 eggs
1 tablespoon vanilla extract

Method

1. Preheat oven to 170 degrees celsius. Line two 12 hole muffin trays with cupcake papers.

2. Sift together the flour, bicarbonate of soda, baking powder and salt. In a separate bowl whisk together the coffee, hot water and cocoa until you have a smooth paste. Add the cold water and whisk until evenly combined.

3. In a separate bowl, cream the butter for 1-2 minutes. Add the caser sugar a third at a time, beating for 2 minute after each addition. After the last addition, beat until the mixture is light and fluffy and the sugar has almost dissolved. Add the vanilla extract and beat until combined.

4. Add a quarter of the flour to the creamed mixture and beat on low speed until combined. Add a third of the cocoa mixture and beat until combined. Repeat this process twice more. Add the remaining quarter of the flour and beat until thoroughly combined; do not overbeat as this will toughen the mixture.

5. Spoon mixture into cupcake papers, filling each about three-quarters full. Note: I use a levelled off ice-cream scoop to divide the batter quickly and evenly. Bake for 18-20 minutes or until a fine skewer inserted comes out clean. Remove cupcakes from the trays immediately and cool on a wire rack for 30 minutes before frosting


Till next time, dear readers!

Ladybird x

Wednesday, 10 August 2011

Coming soon - RSPCA Cupcake Day 2011!


RSPCA Cupcake Day is set to be held again this year on August 15th - that's only a 5 days away! As an animal (and cupcake) lover, this fundraising event is definitely something I look forward to each year - it is such a wonderful cause!

I am so looking forward to this event that I even decided to pen a little poem about it!

Bakers for the RSPCA

Support creatures great and small
Host a morning tea, or set up a stall

All you have to do is register and get baking
Let bakers unite – it’s history in the making!

RSPCA Cupcake Day – it’s an excellent cause
Get involved, and raise your paws!


Tell me, dear readers, will you be cupcaking this RSPCA Cupcake Day?


If you are, that's fantastic!!! Remember to choose your ingredients wisely when baking for this worthy cause.. Using caged eggs really defeats the purpose of supporting the RSPCA's work, so please choose free range eggs :) For more information about how to choose your eggs wisely, please click here.
Not a baker? No problem! Simply support a friend / family member / colleague by buying a cupcake from them on the day, or by sponsoring them through their RSPCA fundraising page. If all else fails, you can sponsor me if you like! To sponsor me, please click here.
So do support RSPCA Cupcake Day 2011 in any way that you can - the animals will love you for it!
Ladybird x

Thursday, 28 July 2011

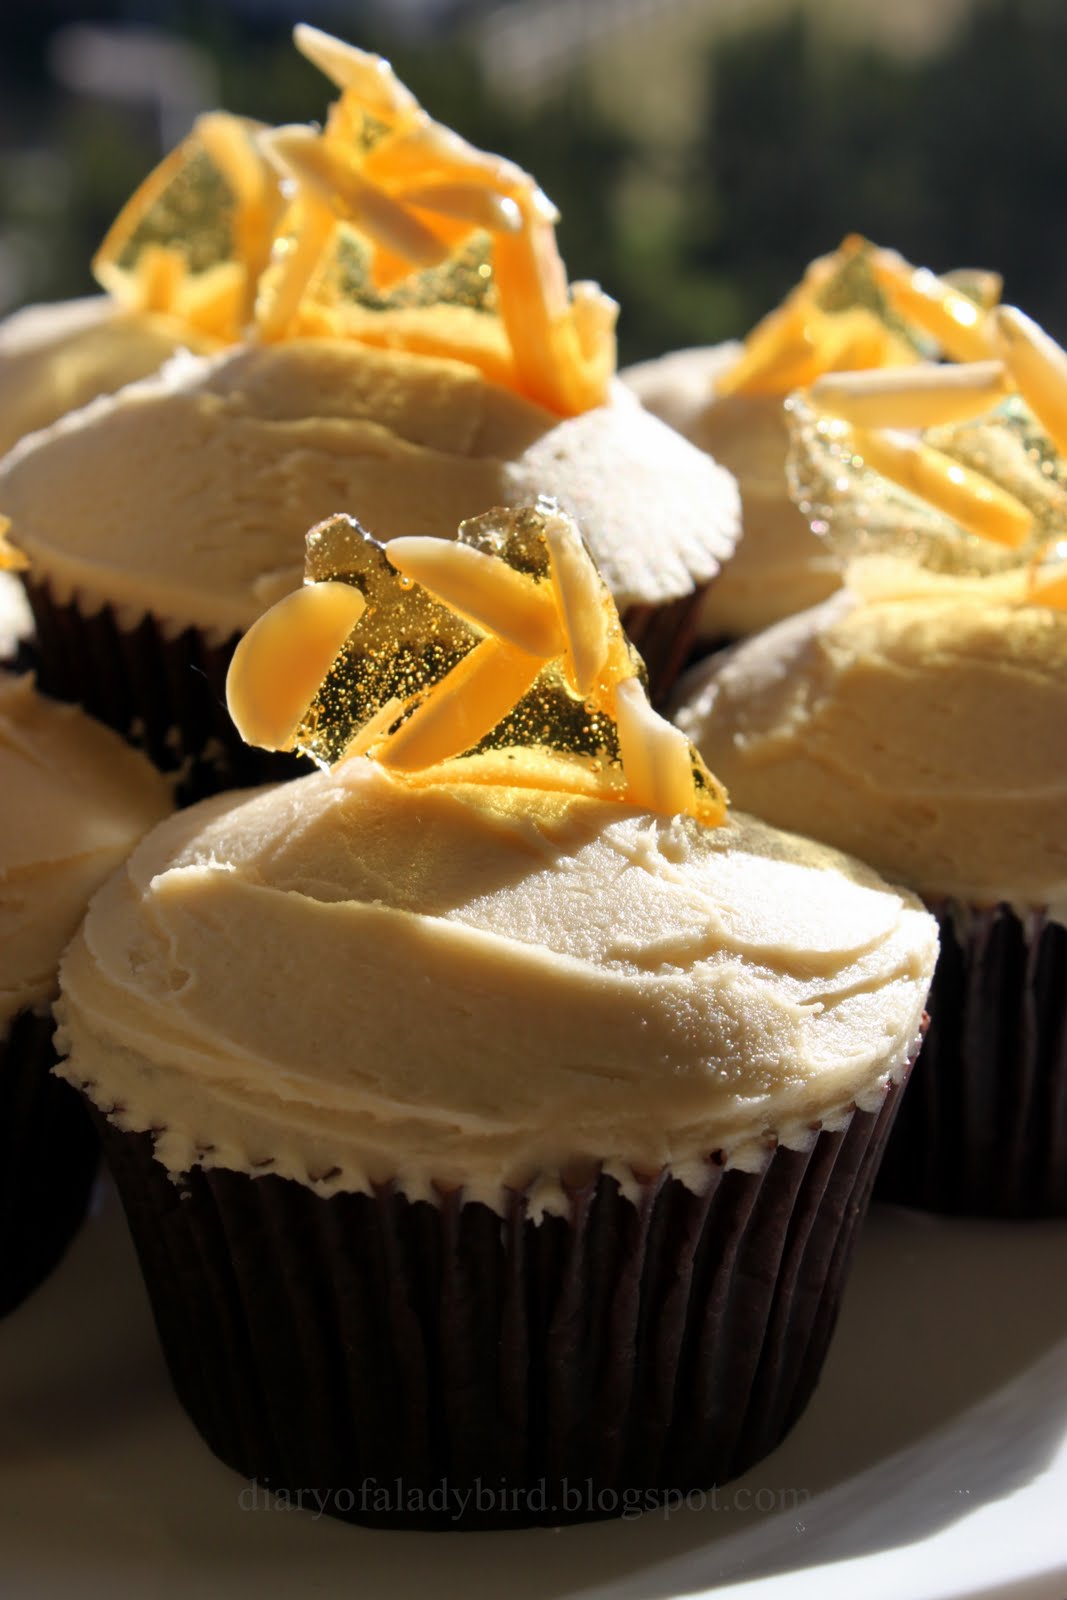
Sticky date pudding with butterscotch sauce and almond praline


How are we all going with Masterchef this season? Or do you watch it at all...? I guess I can only speak for myself and what I've heard from my family and friends... It is great to have Masterchef back on again (and I never quite got into the whole celebrity/children's versions). However, I must say, I'm not enjoying it as much as I did the first season, even the second season.. I am no longer a 'religious' viewer, and nor do my family and friends follow it with the same fervour as they once did. I'm not quite sure what it is, but it seems to me that Masterchef has become a little larger than life, a little over-dramatic perhaps... At any rate, may the best cook win!

Regardless of your sentiments on the show, please allow me to take all you Masterchef fans on a nostalgic journey back to Season 1 in 2009. Do you remember the Sticky date pudding challenge?! How many of you bookmarked the recipe on the website and never got around to making it..? Anyone? Well, I know I did.. cleaning up my bookmarks recently I decided it was high time I got around to it making it!

This is a winter classic -absolutely wonderful :)

Sticky date pudding with butterscotch sauce and almond praline
Recipe from Masterchef Australia (Season 1)

Ingredients

180g dates, pitted and roughly chopped
1¼ cups (310ml) water
½ tsp bicarbonate of soda
¾ cup (165g) firmly packed brown sugar
60g butter, softened and chopped
2 eggs
1 cup (150g) self-raising flour

Almond praline
½ cup (110g) caster sugar
¼ cup (35g) slivered almonds

Butterscotch sauce
50g butter
1 cup (220g) brown sugar
1 cup (250ml) cream
1 tsp vanilla extract

Method
 1. Preheat oven to 180˚C (160˚C fan-forced). Lightly grease eight (½ cup capacity) metal dariole moulds.

2. Place dates and water in a saucepan and bring to the boil over a high heat. Remove from the heat. Add bicarbonate of soda, stir until dates start to break down, set aside to cool, stirring occasionally.


3. Beat butter and sugar in a bowl using a hand beater, gradually add eggs one at a time, beat until light and fluffy.


4. Add date mixture, stir to combine. Carefully fold through sifted flour, divide mixture evenly between the eight moulds, until 2/3 full.

5. Place moulds in a baking tray, carefully pour water in tray until it comes up 1/3 of the side of the moulds. Bake in oven for 40 minutes or until golden and skewer comes out clean.

6. Meanwhile, for the almond praline, combine sugar and 2 tablespoons water in a saucepan over medium heat and cook caramel without stirring, swirling pan, until deep golden. Scatter almonds onto a baking paper-lined oven tray, pour over caramel and cool until set. Break praline into pieces.


7. For the butterscotch sauce, combine butter, sugar, cream and vanilla in small saucepan over low heat until butter melts and sugar dissolves. Bring sauce to the boil, reduce heat and cook for 5-6 minutes or until sauce thickens slightly.

8. To serve, invert the hot pudding onto a serving plate, top with butterscotch sauce and shards of praline.


CUPCAKE variation
As I only have 4 dariole moulds, I used the leftover pudding batter to make some delicious cupcakes!


Here's how...

Sticky date cupcakes with butterscotch buttercream and almond praline
makes 10-12 cupcakes

Cupcakes
For the cupcakes, follow the above pudding recipe and divide among a cupcake paper lined muffin tin, filling each three-quarters. Bake at 180 degrees celsius on an upper shelf for 30 minutes, or until an inserted skewer comes out clean. Sit in tin for a few minutes then transfer to a wire rack to cool.


Butterscotch buttercream
Cream 125g softened unsalted butter, 1½ cups sifted icing sugar and 1 teaspoon vanilla extract until light and fluffy. Add 4-5 tablespoons cooled butterscotch sauce (recipe provided above) in an electric mixer until the desired consistency is achieved. Pipe or spread over the cooled cupcakes, and finish with a shard of the almond praline (recipe provided above).


So tell me, if you are a viewer, what are your thoughts on the current season of Masterchef Australia?

Ladybird x

Thursday, 7 July 2011

Ladybird Cupcakes


I can't believe I've been blogging for almost 2 years now and have never made Ladybird Cupcakes before now! Well today's post addresses this most despicable oversight in Diary of a Ladybird's archives, and hopefully this mini-tutorial will guide you through how you can make them too.

The inspiration for these comes from the Planet Cake decorating book by Paris Cutler.


Bake your cupcakes
Bake your cupcake of choice. I chose my favourite chocolate cupcake/cake recipe, but you could also go for a classic vanilla cupcake.

Ganache the cupcakes
Using your ganache of choice, roughly ganache the tops of the cooled cupcakes. Allow to set for at least half an hour, then smooth over with a palette knife dipped in hot water to create a perfectly smooth and even cupcake surface. Allow to set for at least an hour, and once dry to touch they are ready for decorating.


Cover with black fondant
To cover and decorate the fondant you will need black and red fondant, as well as a very small amount of white fondant. Roll out your black fondant to a 3mm thickness, and cut out circles with a circle cutter to fit the top of your cupcakes. Lay and smooth the fondant on top of the cupcake.


Decorate with fondant
Now the fun part of decorating begins! Thinly roll out your red fondant and using the same circle cutter you used for the black fondant, cut out the same number of red circles. Then using the cutter, cut a small piece out of the circle, then split the larger portion in half with a sharp knife. The picture below should hopefully explain what I mean here...


Using the two larger pieces, dab/brush a small amount of water on the reverse of each and lay them on top of the cupcakes with the red pieces (wings) splayed apart slightly. Discard the remaining piece of red fondant.


Using a small circle cutter, cut out the ladybird spots from some rolled black fondant and attach them to the wings with a tiny amount of water dabbed beneath each spot.


Make the final touches
To make the ladybirds' eyes, roll tiny balls of white fondant and attach them to the cupcake (with a tiny touch of water if necessary). For the pupil in each, use a very fine paintbrush and a little black food dye.

Finally, press part of the end of a plastic straw (or a clean plastic pen cap) to create the smile indent in each ladybird's face.


So there you have it - simple and beautiful ladybird cupcakes. I don't know about you, but I find their little faces so cute that I can't help but smile back at them! :)


Till next time, dear readers...
 
Ladybird x

PS- Remember my salted caramel, peanut and chocolate tarts? I've entered my recipe into the Lurpak Callenge and I'd really appreciate your support in the final days of voting.  To vote for my original recipe, please click here!

Saturday, 18 June 2011

How to make an eggless cake


Actually... let me make that - How to make a good eggless cake!

My mission to find a good, basic eggless cake recipe goes back years. Many of Mr Ladybird's family don't eat eggs, and as an avid baker I have always been on the lookout for baked goodies that they can enjoy without eggs, but without sacrificing on flavour and texture. I can't tell you how many eggless cake recipes I've tried in the past only to be disappointed by sometimes bad/sometimes mediochre results. It is quite a challenge to create a tasty eggless cake that exhibits all the qualities you'd expect of a nice cake - good flavour, texture, height and crumb. I thought it an impossible task - until now! The result is a little denser than your average cake, but certainly a good result nonetheless...


Last week I came across a basic eggless cake recipe that struck me as being a little different to those I'd trialled in the past. Unlike others that included vinegar, yoghurt, egg replacement powders and a myriad of other ingredients, this one was a little different. The secret ingredient...?

Sweetened condensed milk!


I was so pleased with the result that I knew I had to share this recipe with you straight away. This recipe is one I've slightly adapted from a fantastic blog I've found called Divine Taste - well written posts with great recipes, and always accompanied by beautiful food photography.

This is a useful recipe to know in case you ever need to make an eggless cake - be it because of someone's allergy, personal preference, or even if it's because you don't have any eggs left in your kitchen! Using a good quality vanilla extract makes all the difference here - so please don't use the artifical stuff (i.e. vanilla essence) if you can avoid it. It is well worth paying a little more for real extract. You can get creative with this recipe too. You could even adjust the baking time and use the batter to make eggless cupcakes. This time around I simply cut it into 2 layers and sandwiched it with warmed strawberry jam and whipped cream before showering the top with icing sugar.


Basic Eggless Cake
Recipe adapted from Divine Taste

250g plain flour
2 tsp baking powder
1 tsp baking soda / sodium bicarbonate
1 tin (395g) sweetened condensed milk
100g unsalted butter, melted
175ml milk/water (I used 175ml low fat milk)
2 tsp vanilla extract

1. Grease and line the bottom of a 20cm round cake tin with baking paper. Preheat your oven to 100-120 degrees celcuis.

2. Sift the flour, baking powder and sodium bicarb into a bowl and whisk to combine and ensure the mixture is uniform.

3. Add the condensed milk, melted butter, vanilla essence and milk/water into the mixing bowl containing the dry ingredients one at a time, using an electric hand mixer, whisk or spoon to mix until the batter comes together and there are no lumps. This shouldn’t take more than a minute with an electric hand mixer/beater. Be careful not to over beat the mixture as this could result into a hard cake.

4. Inrease your oven temperature to 150 degrees celcuis and pour the batter into the cake tin and bake for
50 - 60 minutes, or until a skewer inserted into the middle of the cake comes out clean. Transfer the cake to a cooling rack and use as required.


Have you ever tried making eggless cakes? If you know of any good recipes, why not share your links here!


Ladybird x

PS - I thought I might also mention that I had a media mention on a UK news site earlier this month! You can read the full article here.

Wednesday, 22 September 2010

How to make individual cupcake stands


In my recent post about the hat themed birthday cupcakes I made, I also showed you this individual cupcake stand. I also promised you I'd be telling you how to make this yourself at home. It is so easy, and it looks just adorable. So get your "arts 'n' crafts" hats on - here's how it's done!

Here are the materials you will need...
1 small saucer/shallow bowl (pictured left)
1 egg cup or similar (pictured right)
superglue

These materials are readily available and very inexpensive from most discount shops like 'Hot Dollar' here is Sydney.


Run a thin line of superglue around the base rim of the eggcup and place onto the centre of the inverted dish (as pictured below).


Leave to dry for a couple of hours, and you're done! You've made an individual cupcake stand :)


I must admit, I'm not usually a very craft-oriented person. I don't think you'll ever catch me whipping up a collage in my spare time, or becoming anything remotely close to a scrapbooking addict. You're far more likely to catch me in the kitchen, or not far away urging someone to eat another slice of cake! It's not that I don't like arts and crafts... I just don't really have the patience for it to be honest. And... I'm also afraid of gluing my fingers together! :P

Despite this, I did discover my inner Martha Stewart rather unexpectedly of late. After I made a couple of these cupcake stands I started thinking about how to decorate them. I think they look great plain, but you could jazz them up a little, especially if they were for use in a themed party. Before I knew it, I was in a craft shop hunting down ribbons, cut-out felt shapes and scrapbook borders with adhesive backing. Here are just a few ways I decorated mine...


So tell me, are you into arts and crafts?


Ladybird x

Saturday, 18 September 2010

Hat themed birthday cupcakes


Just a quick post today before I hit the hay. I need my beauty sleep for an exciting event I'm attending tomorrow! You'll have to stay tuned for the post about it for all the details, but I will say that it involves cake :D So excited right now, how will I ever sleep?!

Before burying myself in the warmth of my bed covers, here are some photos of the cupcakes I made this week for a colleague. It was her father's 80th birthday, and seeing as her father loves hats, it seemed only fitting to incorporate hats into the theme for the cupcakes.

I thought about what sort of hats to create. I mean, there are so many, right? Berets, sombreros, beanies.. they're all hats, but would they make good cupcake toppers?? Perhaps.

In the end I settled on cowboy hats, baseball caps and top hats for the occasion. All in keeping with the black, white and orange colour palette for the 50 cupcakes in total.


And last (but not least), I wanted to show you this...


Yes! An individual cupcake stand :) Cute, n'est pas?

I'll be showing you how to make your own individual cupcake stands at home very soon, so stay tuned, my lovelies!


Ladybird x

Thursday, 19 August 2010

Rockabilly Cupcakes


Rockabilly
(noun) Pronunciation:/ˈrɒkəbɪli/
a type of popular music, originating in the south-eastern US in the 1950s, combining elements of rock and roll and country music
Origin: 1950s. Blend of Rock and Roll and Hillbilly.


This was the Oxford dictionary entry I referred to when a dear colleague of mine asked me to do a 21st birthday cupcake job for her. I really had no idea what rockabilly was, but I was certainly honoured to be asked to create cupcakes for such a milestone occasion in someone's life and it was lovely to know I put a smile on the birthday boy's face :)

So what sort of imagery is appropriate if we're talking about rockabilly? Think Betty Page and Johnny Cash. Think pinup girls in red lips and vintage bathing suits, dashing rockers in suits with greased hair... Think nautical stars, cherries, dice, and LOTS of red and black. The more I researched, the more I grew to like the edgy-vintage feel of all things Rockabilly!


Monday, 16 August 2010

RSPCA Cupcake Day

One of my first ever blog posts was 2009 RSPCA Cupcake Day. A year on, I am more passionate than ever about using baking to raise money for worthy causes such as The Heart Foundation and MS Australia. However, if there is one day that I go all out for charity, it's RSPCA Cupcake Day which was today!


Thank goodness it was held on a Monday, because it takes a longgg time to bake, ice and decorate over 100 cupcakes from scratch. It's times like this you crave the capacities of a big kitchen! Nevermind.. my little kitchen managed to cater the job.

Besides, I got to wear my RSPCA Cupcake Day Shirt that I ordered last week and picked up from the post office this morning (just in the nick of time!)


I kept the flavours relatively simple due to the quantity (over 100 in total!) Here's just some of what was on offer for benevolent buyers:

Vanilla with vanilla bean buttercream
Vanilla with white chocolate and vanilla bean ganache
Chocolate with chocolate ganache and strawberries
Lemon with lemon buttercream
Carrot with cream cheese
Chocolate with salted caramel


Cupcakes were decoated with butterflies, dragonflies, pawprints, dog bones for an animal themed spread. However, my  favourite decoration of all was the little fondant carrots I made, finished with a tiny sprig of dill to complete the effect.


The fastest cupcake to sell out was the chocolate with salted caramel icing - Dang! they tasted fine, even if I do say so myself! I've never really liked caramel.. but with a little bit of fleur de sel, caramel is taken to a whole new level! It's sophisticated and grown up, and pairs beautifully with a moist chocolate cake like this one.


Lucky for me, my office has quite a sweet tooth and people get behind a good cause when they see it. As a result, I raised $360 for the RSPCA :) My most successful 'Cupcakes for Charity' event yet!

Thank you to everyone who supported RSPCA Cupcake Day today... across the country animals are barking, meowing, quacking and goodness knows what else in appreciation of your generosity!

http://www.rspcacupcakeday.com.au/


Ladybird x
Related Posts with Thumbnails